Now that you have your custom dress form arm pattern drafted, it’s time to sew it up! Here’s what you’ll need.
Beatrice Forms x Sophie Hines Custom Dress Form Arm
SEWING SUPPLIES
- 1 yard Stiff Canvas (consider using your skin tone color)
- 1 bag Wool Batting OR Polyfill
- Cardboard
- Wool Scrap (for easing arm cap)
- Thread (matching your canvas )
- Thread (contrast color)
SEWING PATTERN
- Your Custom Dress Form Arm Pattern

Your materials! You’ll need the arm pattern that you drafted according to the instructions of our last post, a yard of stiff canvas, and some nice cardboard.

Trace, pin, or weight your Outer Arm, Inner Arm, Arm Cap, and Wrist Cap pattern pieces onto your canvas.
You’ll cut two of each pattern piece out of your canvas, transferring all marks and lines with a pencil.

The Arm Cap + Wrist Cap pieces without seam allowances will be your cardboard inserts in the shoulder and wrist, that keep it stiff and looking nice.
Treat the fluting (the ridges sandwiched inside of the cardboard) as the material’s grainline, and trace your Arm Cap and Wrist Cap insert pieces on the bias. Mark the shoulder break points and front and back with a pencil.
Cut two of each piece, mirroring the pattern for the second pieces. Don’t forget to mark the front + back of the Arm Cap pieces!

Align and stack your cardboard pieces and glue or tape with the fluting of the two pieces laying perpendicular to each other. This lends strength to the cardboard and keeps it from bending inside of your arm.

On your Arm Cap canvas pieces, snip or mark your shoulder break points with a pencil. On the rest of your canvas pieces, snip or mark the vertical grainlines, bicep, and forearm lines.

Pin the two layers of your canvas pieces together, then trace the grainlines + markings on the wrong side with a pencil.
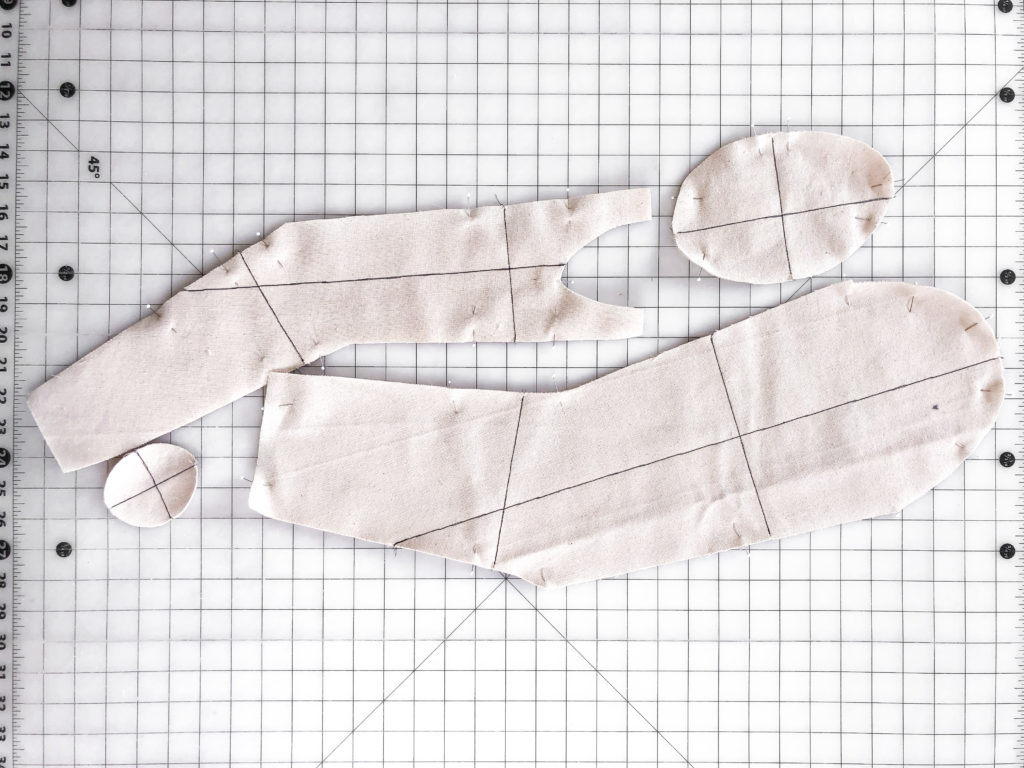
Sew over these pencil lines twice with your contrast thread.
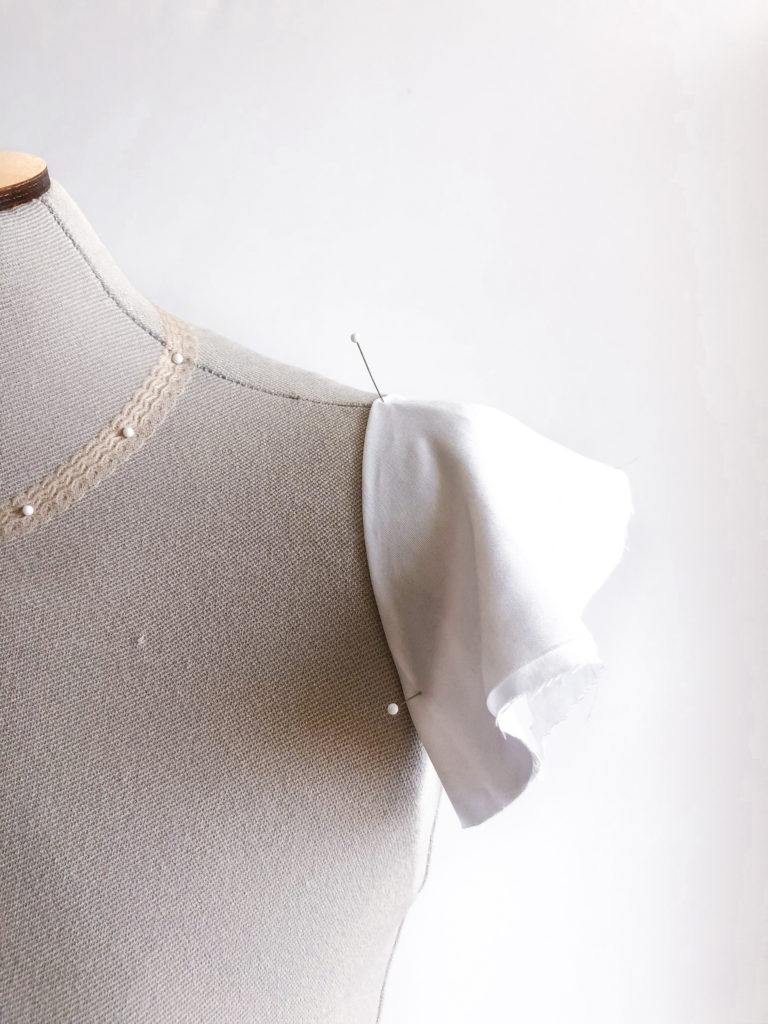
Use a piece of scrap fabric to drape a Shoulder Cap. Fold your scrap in half along the bias, and place onto the shoulder an inch or so from the edge of the arm cap. Pin in place, and shape + pin the front and back sides.

Trim away the excess fabric evenly around the Shoulder Cap. Mark the dress form shoulder seam, front, and back.

Remove the Shoulder cap. Trace a straight line on a piece of paper. Unfold your Shoulder Cap piece and lay it with the fold along the line.
Trace your Shoulder Cap onto the paper, smoothing lines with a French Curve ruler. Transfer all markings. Add your desired seam allowance (.5″/ 1cm /5/8″ etc.), and mark your grainline and fold line (that center line on the paper).
Cut one of your new Shoulder Cap pattern pieces out of your canvas. Transfer front, back, and shoulder seam markings.
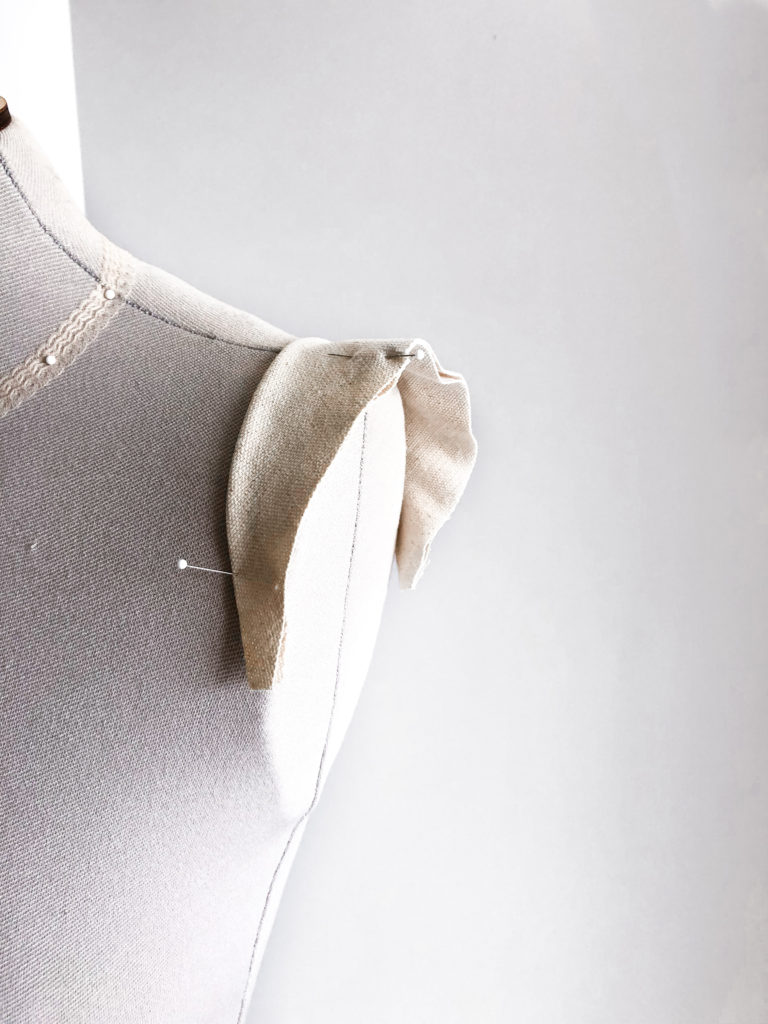
Perfect!
NOTE After photographing the following steps, I realized that there was an easier way to assemble the pieces. Some of the steps no longer exactly align with the order shown in the photos, or have been converted to diagrams. Any differences will be noted.
Pin and sew the bottom curve of your Arm Cap piece to your Inner Arm piece. Clip the curve of the inner arm piece to help ease the Arm Cap in.
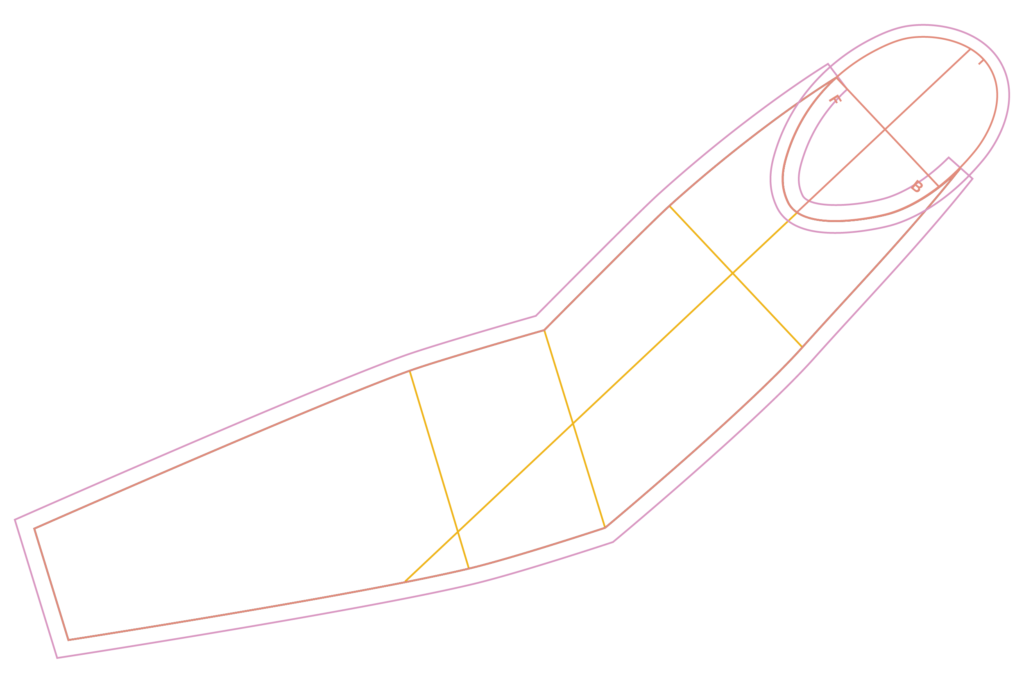
If you included darts in your Outer Arm pattern, sew them up now!

Cut a piece of wool about an inch and a half wide and as long as the shoulder curve on your Outer Arm piece.
Align the wool with the top curve of your Outer Arm on the right side, and sew, just inside your seam allowance line and stretching the wool as you sew around the curve. Stretch the most over the top of the shoulder curve, easing back at the beginning and end of the seam.

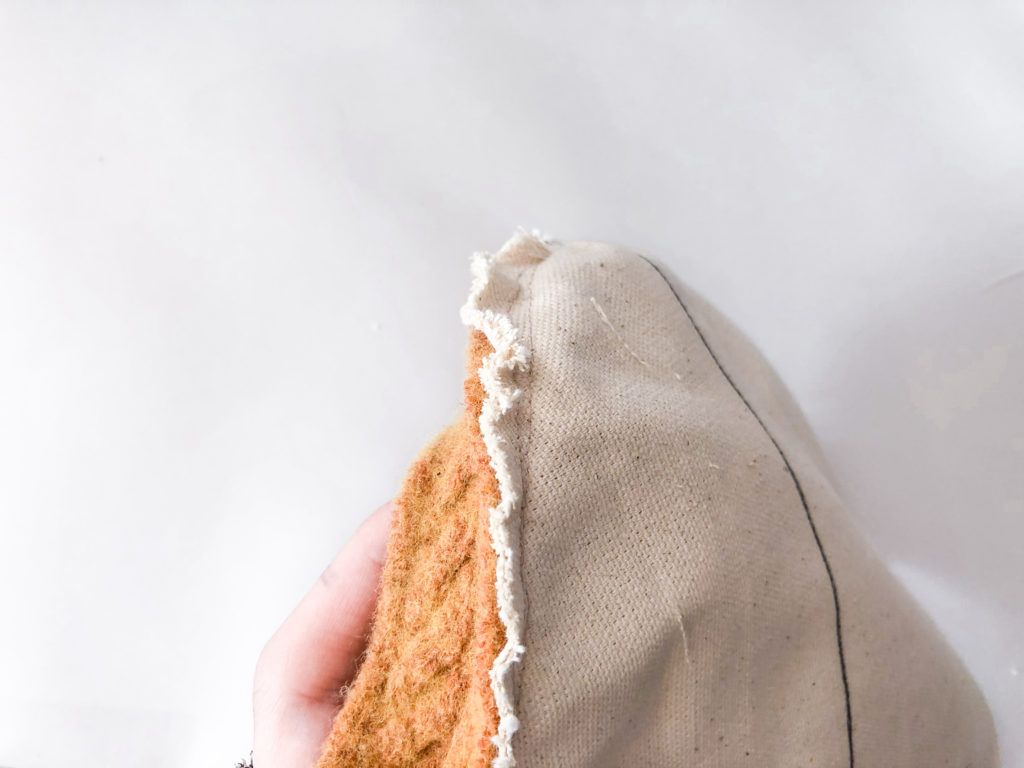
Now your arm cap is nicely eased!!
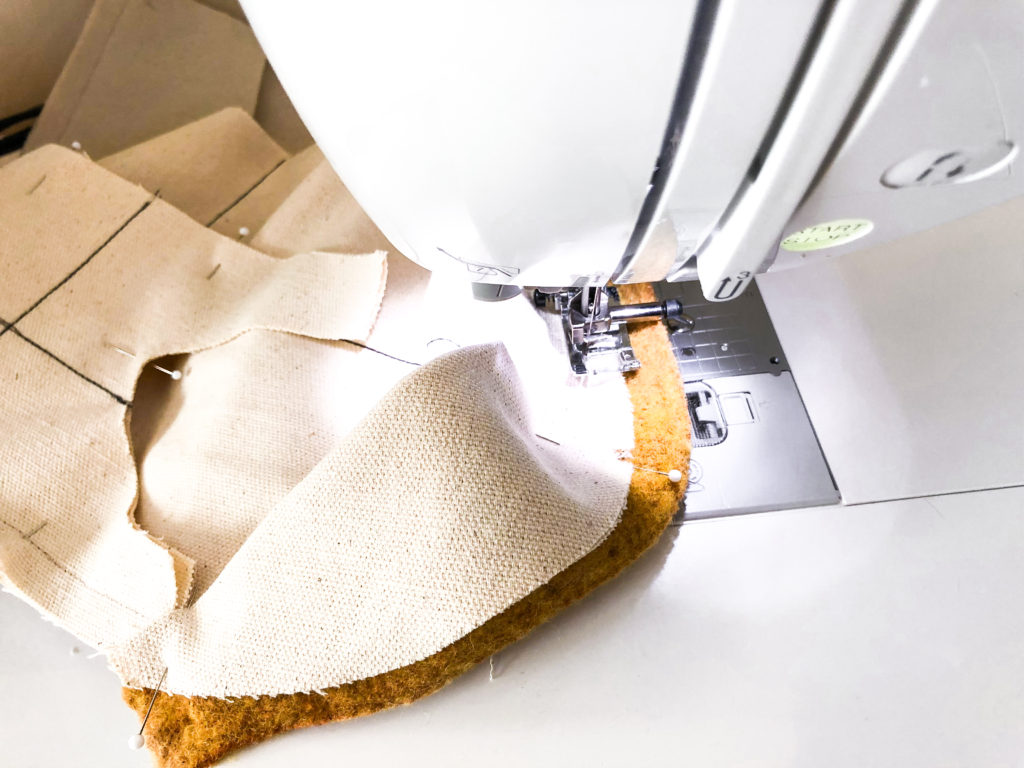
Fold your Shoulder Cap piece in half along the fold line.
Smooth the wool strip towards the cut edge of the Outer Arm, and pin the Shoulder Cap (unfolded edge) to the top of the Outer Arm at the shoulder seam marking. Pin the ends of the Shoulder Cap, and add as many more pins as you need. (Disregard the Inner Arm already attached in this photo)

Sew following the edge of the wool, easing the pieces together as you go.

Pin the Outer Arm and Inner Arms together with right sides together (yours will have the Arm Cap already attached) and sew, leaving an opening in the bicep, wide enough for you to get your cardboard Arm Cap through, and one in the forearm to insert your Wrist Cap insert.
Ease the Inner and Outer Arms together around the shoulder curve, making sure that your Shoulder Cap is inside, and the wool strip is outside. You may also need to ease the pieces together around the elbows.

Here’s what your arm looks like now!!

Clip around the wrist opening. Align the grainline seam at a small end of your Wrist Cap oval with the seam at the front of the arm, or inner elbow.

Pin the Wrist Cap to the wrist opening, easing and clipping until it fits smoothly without puckers, then sew.

Time to put in your cardboard inserts! (Yours will already be glued or taped together into stacks)
Slide your Shoulder Cap Insert through the opening in the bicep, taking care that the front and back, top and bottom are aligned correctly.

Do the same with the Wrist Cap insert. If desired, add some hand stitches around the edges, through the cardboard, to keep it securely in place.
Work the seam allowances away from the edges of the cardboard pieces, so they aren’t caught between the cardboard and the Arm Caps. This will keep your Arm Caps smooth and professional looking, by removing messy seam allowance lumps.

Stuff your arm to your desired stiffness, then close your openings with a ladder stitch.
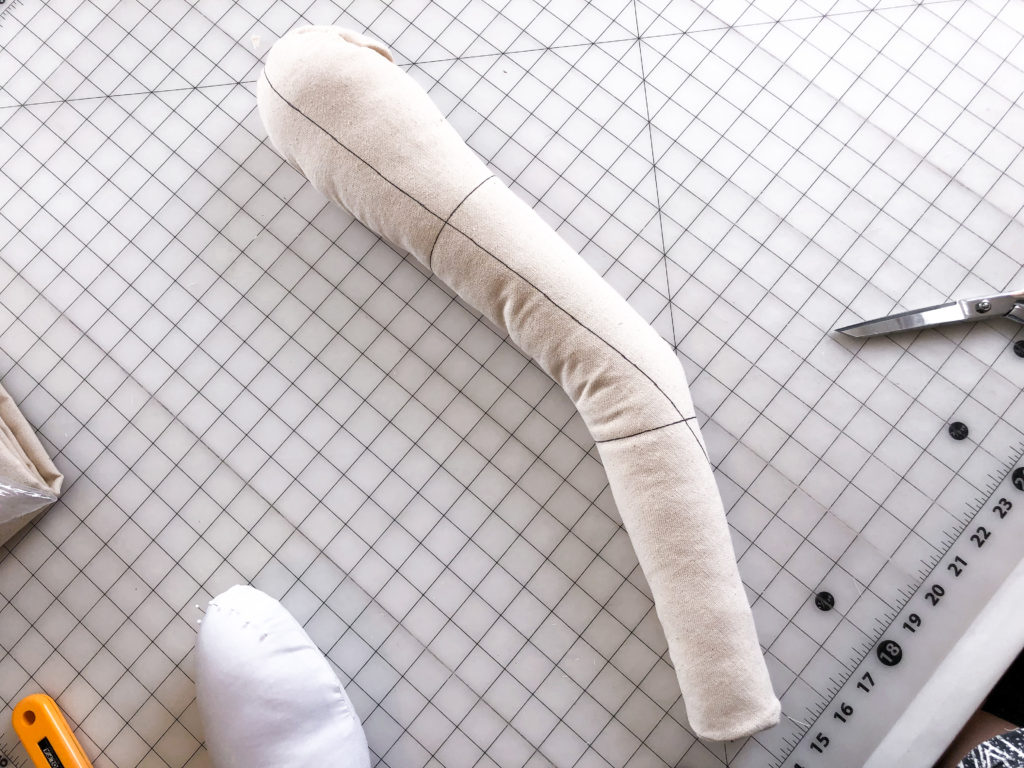
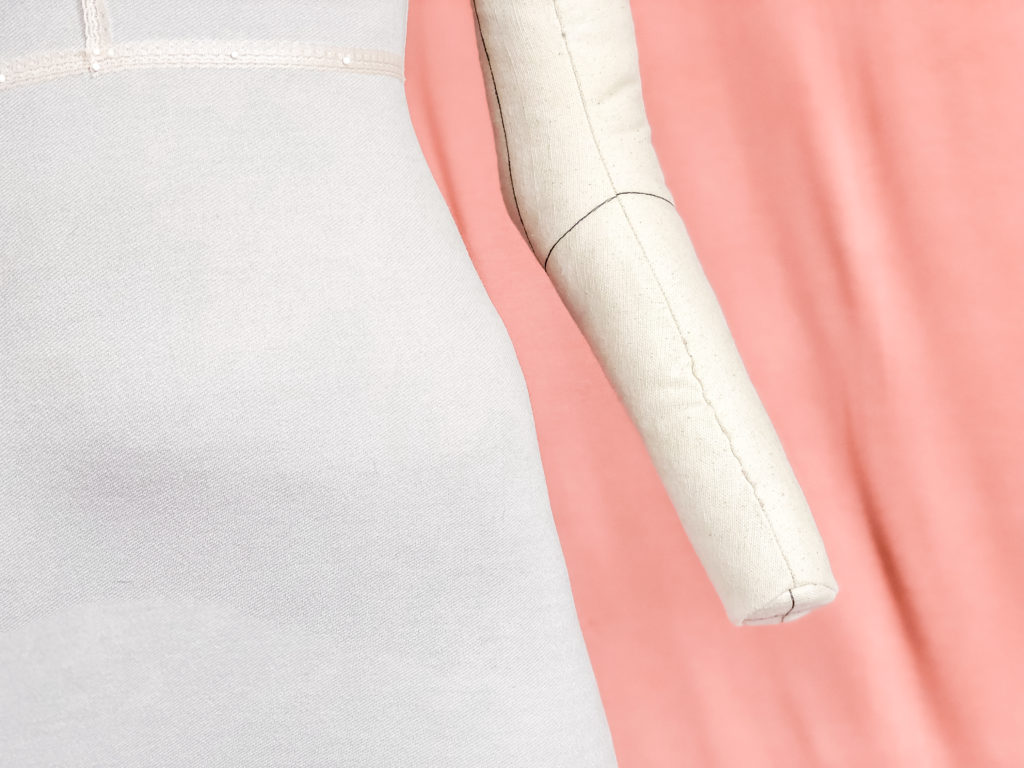
Ta Dah! It’s your very own arm! Crazy! Rest the Shoulder Cap on your dress form shoulder, and pin in place.


Hope you enjoy this tutorial! Let me know how it goes for you!
Happy Sewing!
