Welcome back to Period Panty Sewing School!
Depending on the undie sewing pattern you want to use (I recommend the Arccos Undies!) and your particular body, you may want to lengthen the absorbent + leakproof crotch to extend further up the back, front, or both.
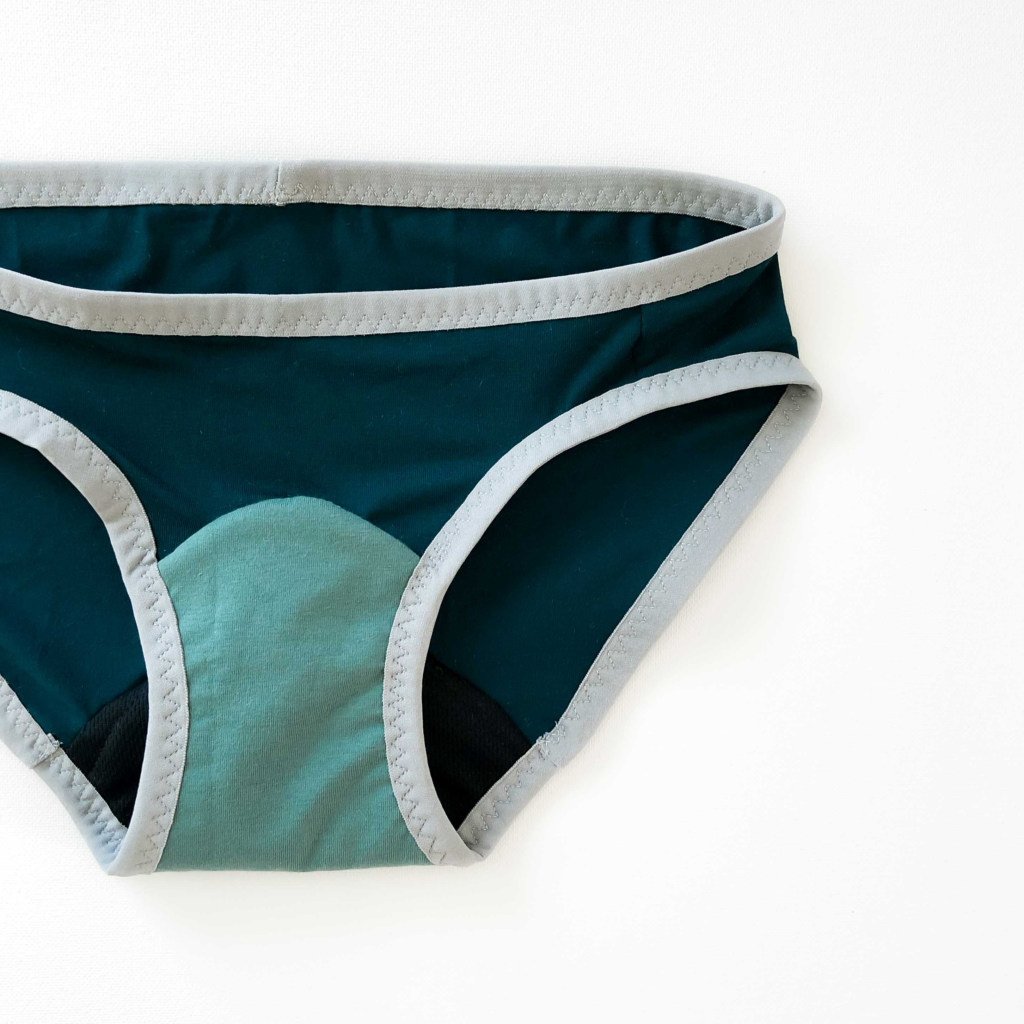
I made a few pairs of Period Panties using the Arccos Undies pattern as it’s drafted, and use them for lighter days, spotting, and when I’m anticipating my period. I made some pairs with extended crotches (photo above) that I wear during heavy days + at nighttime.
The extended crotches are super great for preventing leaks, and because there’s more absorbent material, they can absorb more and last longer than a pair with a shorter crotch.

HOW TO EXTEND THE CROTCH OF YOUR PANTY PATTERN
Start with the pieces for your panty pattern. You should have a front, back, and a separate crotch piece (as shown above). If your pattern doesn’t have an enclosed crotch, see this post to change that!

Start by marking all of the seam allowances in the crotch- the panty front, panty back, and the front and back of the crotch piece. The seam allowances for Sophie Hines lingerie is always 1/4 inch, unless otherwise specifically marked.
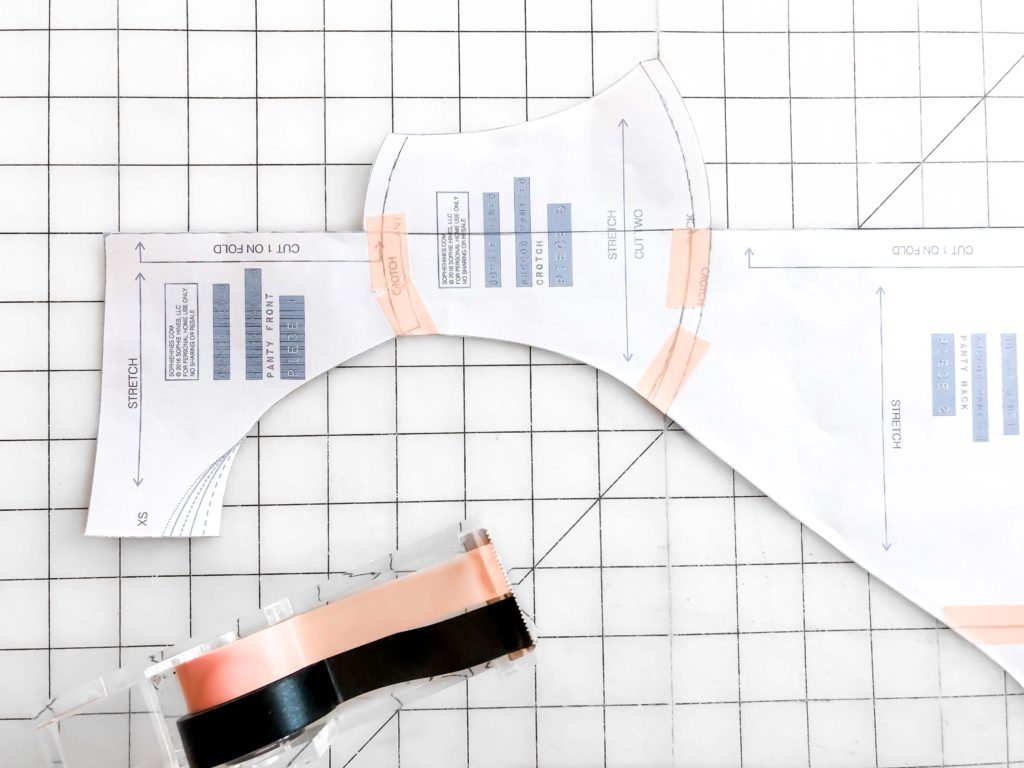
Line up your pattern pieces with seam allowances overlapping, so the seam lines you marked are lined up. Your pattern may have some shaping in this seam, so if the seam lines don’t match up exactly, don’t worry! The main point is to line up the front and back seams at the center line, and make sure everything is in a straight line.
Tape!

Time to mark your new seam lines! The measurements that I used are shown above. The first time I drafted this pattern, I extended the lines equally in the center of the pattern and on the sides. This resulted in a crotch that extended out around my legs, which I didn’t find very comfortable, and restricted movement. I found it much more comfortable to extend the line further in the center, between 1 1/4 inch and 2 inches, and only 5/8 inch at the legs. This resulted in a more streamlined shape, that was easier to work with, as well as maximized the kit fabrics.

Use a French curve to draw your new seam line.

REMEMBER: Your French curve will probably not have a spot that makes the perfect line that you want, so move the curve around and draw in segments till you have the perfect line!

NOTE: Make sure your line comes to a 90º angle with the center of your panty pattern, so the curve is nice and smooth, and doesn’t come to a point or a sharp angle when you unfold your panty pieces.

Here’s the final seam lines! Once the lines are looking lovely to your eyes, it’s time to cut your pieces along the new seamlines.

Now you’re back to the three pieces you’ll need!
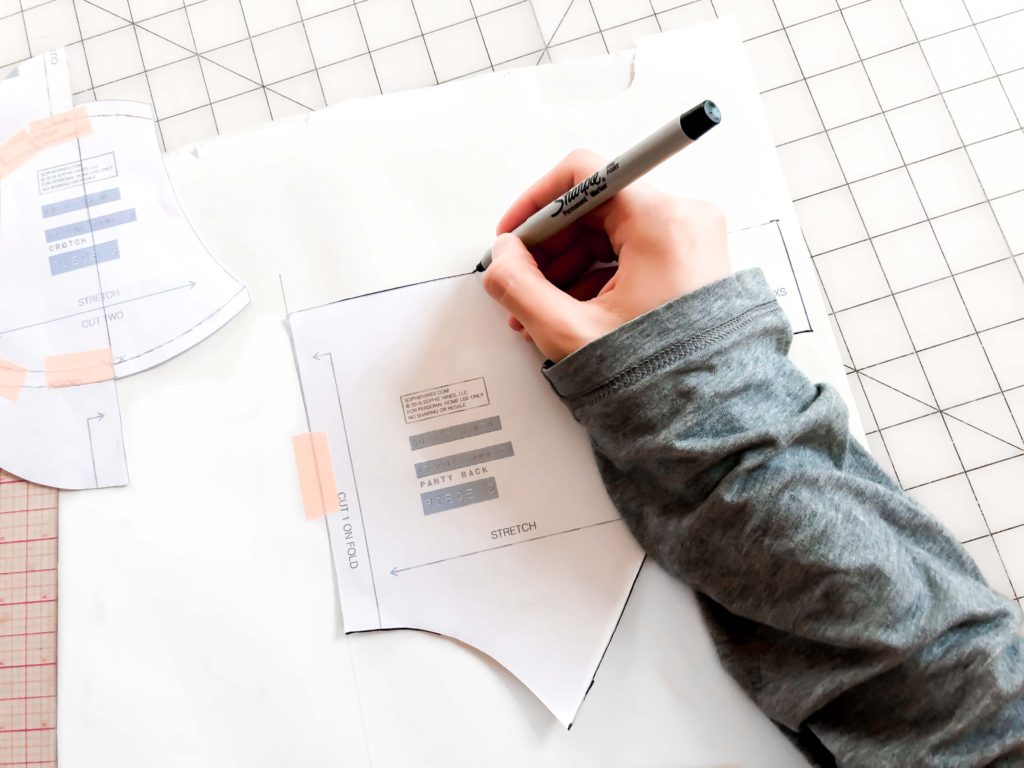
Trace your new pattern pieces. The front and back will be on the fold, so you can just trace them as is, and add your markings and new pattern info.

I like my crotch pieces to include both sides, so if you feel the same you’ll have to trace one side, then flip and trace its’ mirror side to get the whole piece.

Time to add your seam allowance back! I like 1/4 inch, but go with whatever is most comfortable for you to work with on the machine.
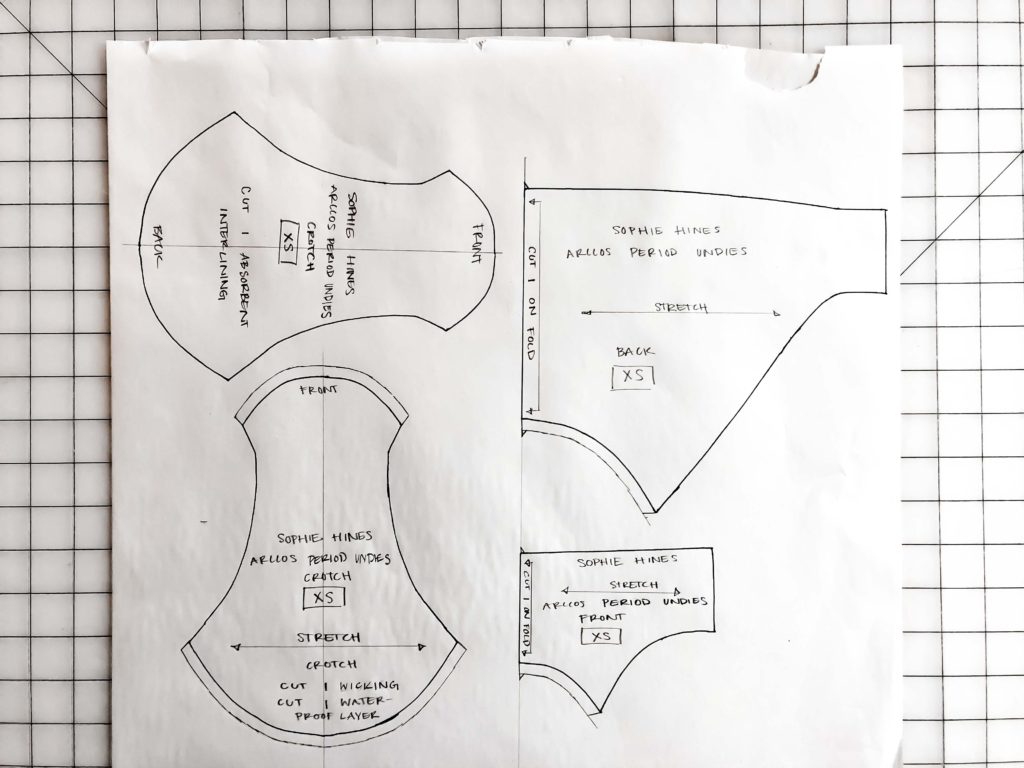
Don’t forget to trace a crotch piece WITHOUT adding seam allowances. This will be your interlining of the absorbent material, which you don’t want in your crotch seams (hello bulky seams)

Once you’ve added all of your pattern piece info, you’re ready to sew! I like to add my name (or the pattern designer’s name), the pattern name, pattern piece, size, cutting info, fold lines, direction of greatest stretch, and front + back or other defining markers. And the date if I’m working on different versions!
Thanks for joining me for Period Panty Sewing School! Up next are sew along posts!! I’d love to see photos of what you make on Instagram, tag me @Sophie_hines and use the hashtag #shinesperiodpanties so we can follow along with you and get inspiration!
Happy Sewing!
