It’s been on my New Year’s Resolution list for years: knit a sweater. You know how you have things you want to do or make, but there’s a slightly irrational reason in your mind as to why you can’t do it?
The mental block keeping me from knitting a sweater was the fact that I have rather wide shoulders, and I was worried about fitting. I can think of approximately fourteen million reasons why trying on a half knitted sweater and trying to assess the fit in a mirror would result in the sweater (or me) coming to total ruin.

You know what would fix that though? A custom arm for my Beatrice body-double dress form! Pop that sweater yoke on there, give it a spin, boom. Success.
Don’t ask me why I’m more comfortable recreating my own arm than I am knitting a square with sleeves (let’s face it, we all know me).
This seriously took me an afternoon to make, and I am so heckin pleased with it! It looks gorgeous in my studio, made fitting my sweater shoulders a breeze, and I’m thinking about making the other arm so I can steam jackets and what have you on it. I feel like a rockstar.
HOW TO DRAFT YOUR CUSTOM DRESS FORM ARM

First, your measurements! For the shoulder apex, I wore a tight fitting top and safety pinned the end of my soft tape measure to the top of my shoulder, at the little bump that is the end of my clavicle bone.
The bicep and forearm measurement locations should be the point of largest circumference on your arm.
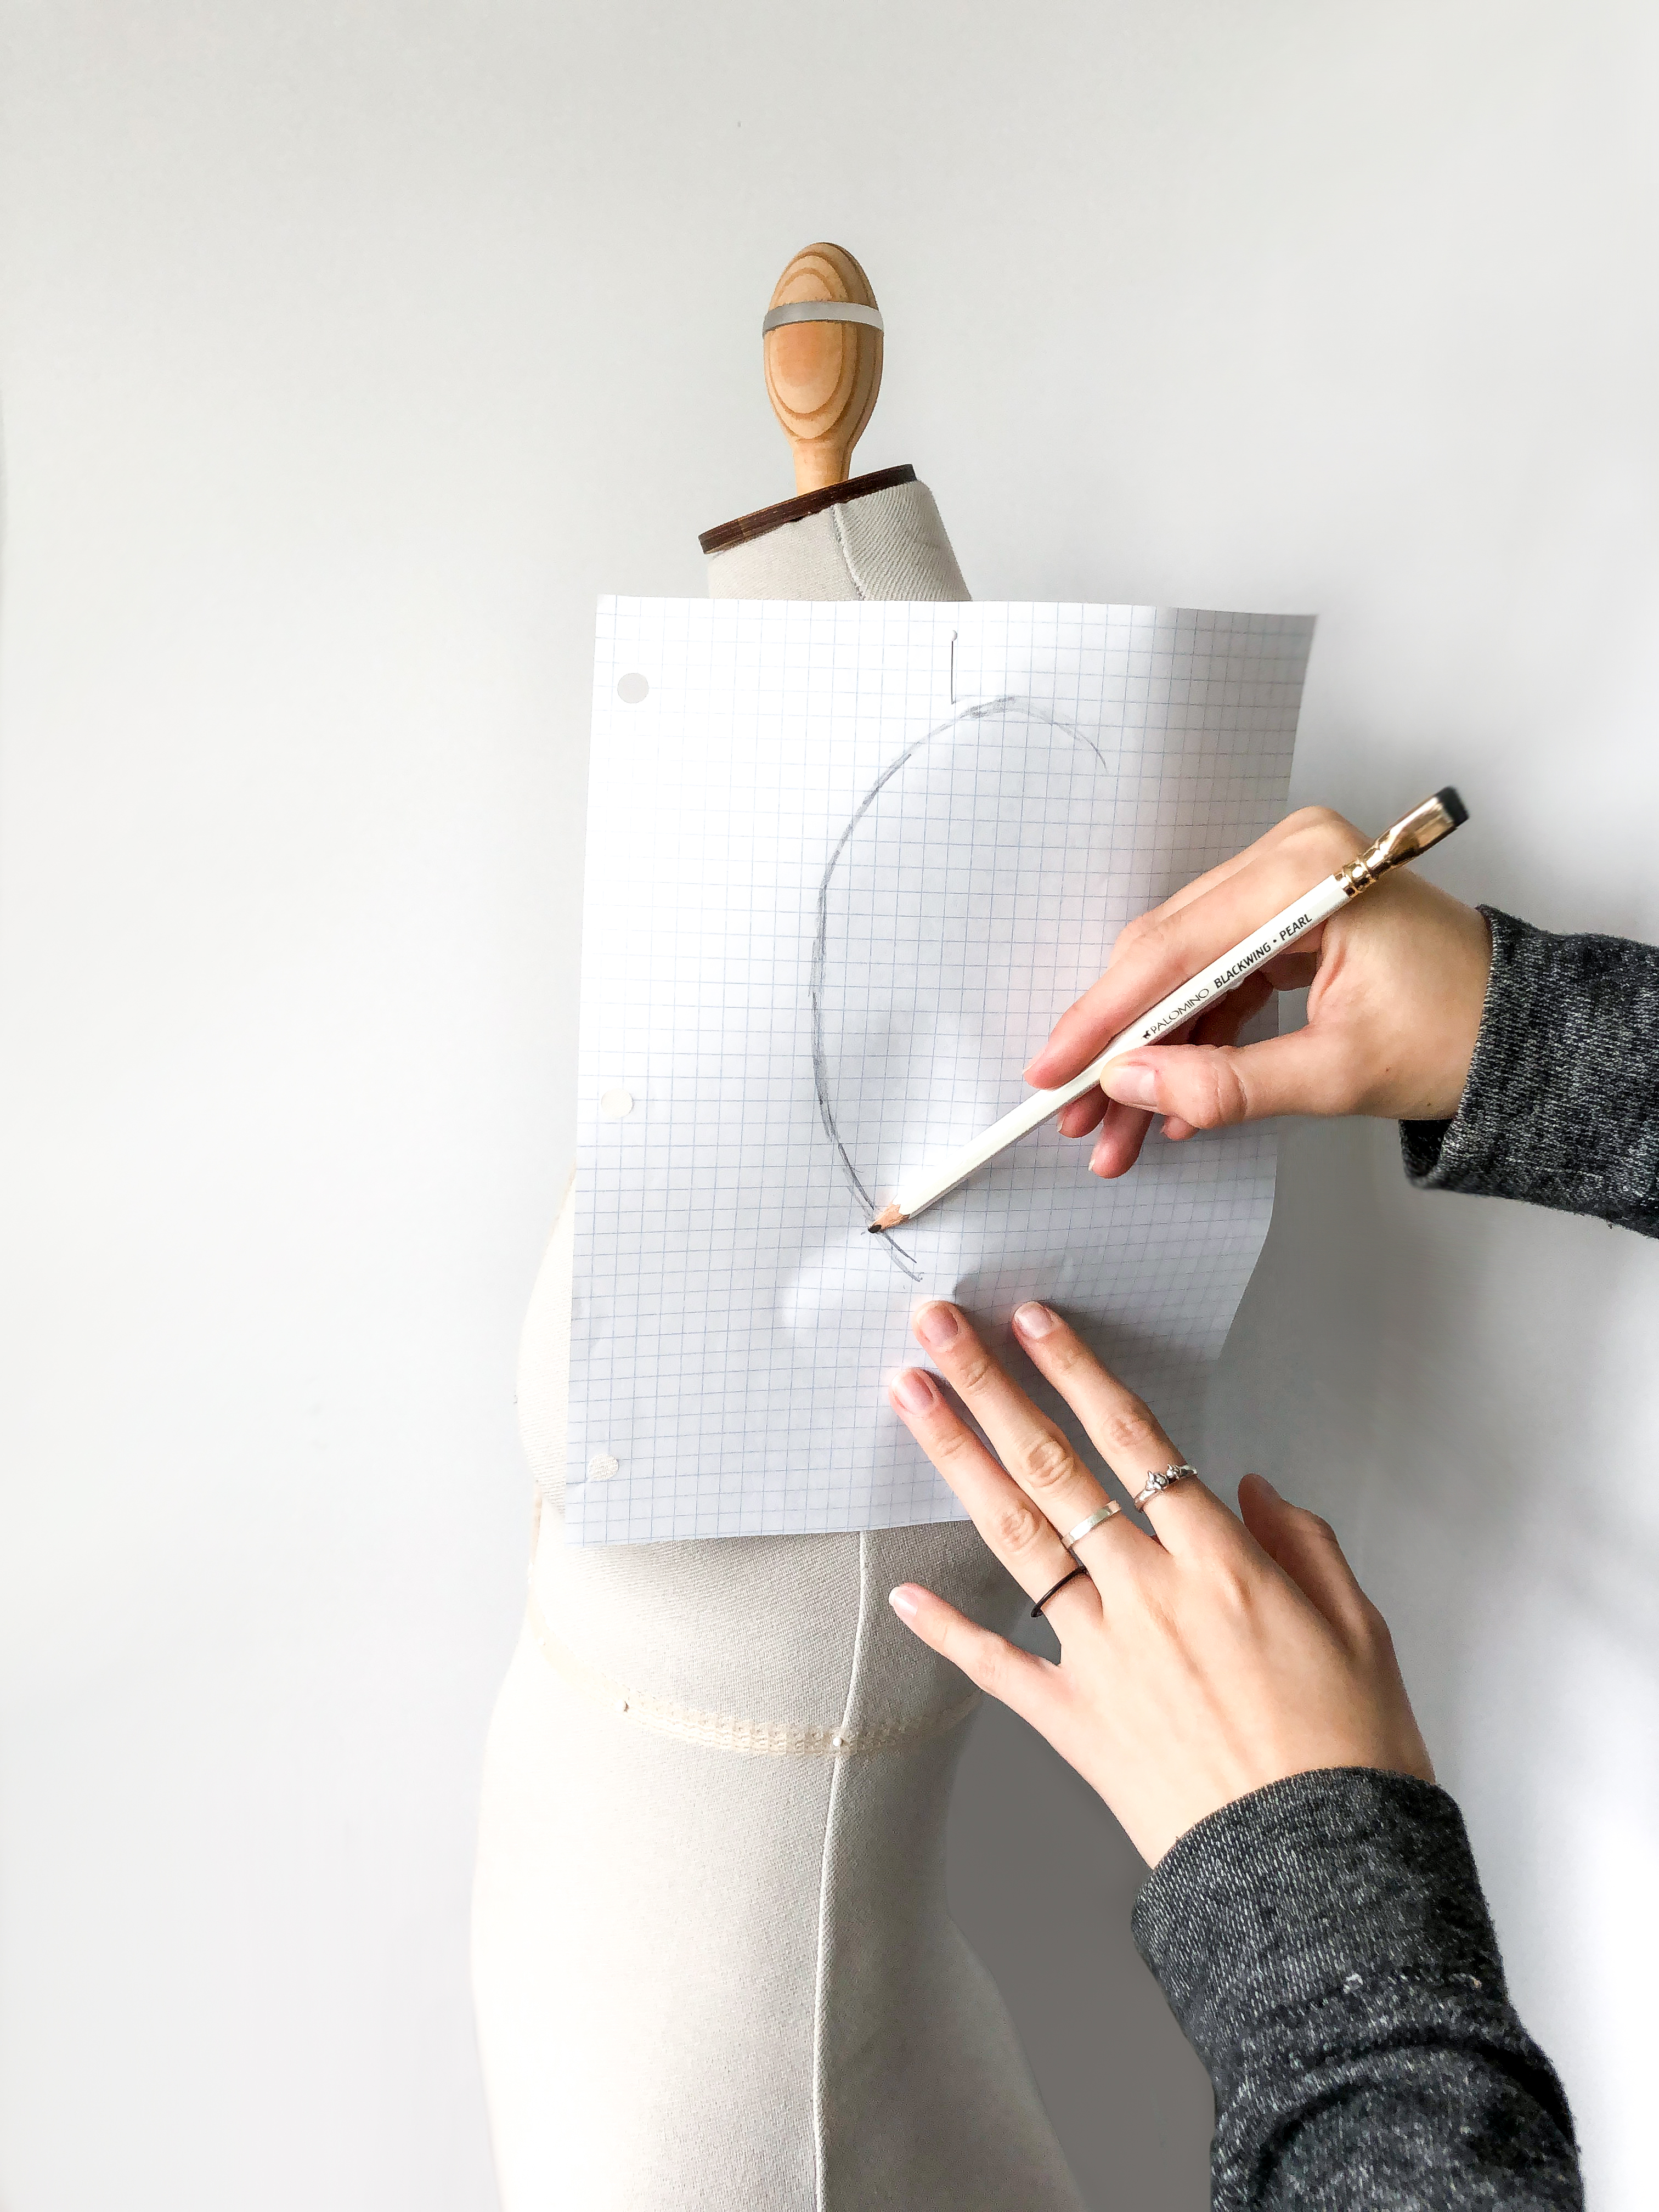
Pin a piece of paper to your dress form shoulder. Use a soft pencil to shade around the edge of your dress form arm cap to capture the shape. Mark the shoulder and side seams so you know how it’s positioned on the dress form.

Once you have your arm cap pattern piece, you’re ready to start drafting the under arm.
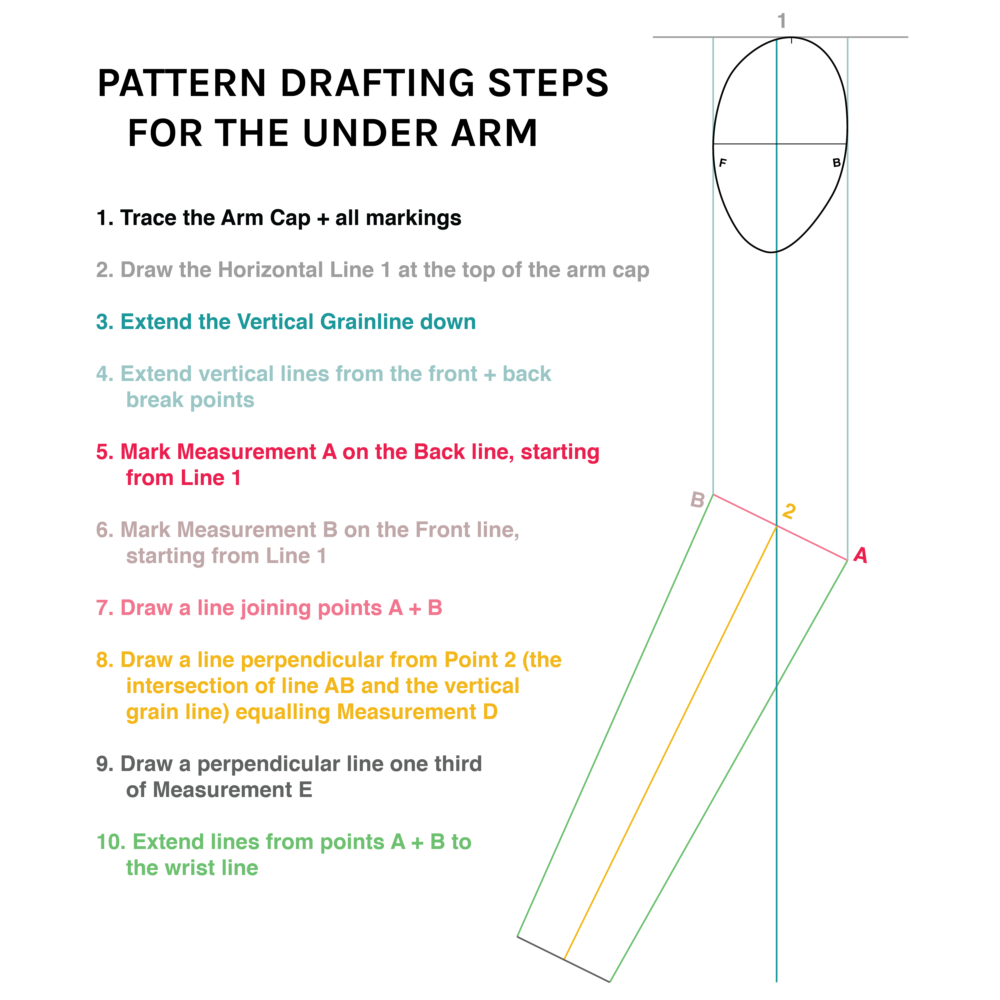
First you’ll start by drafting your underarm base, which you’ll then adjust more specifically to your measurements.
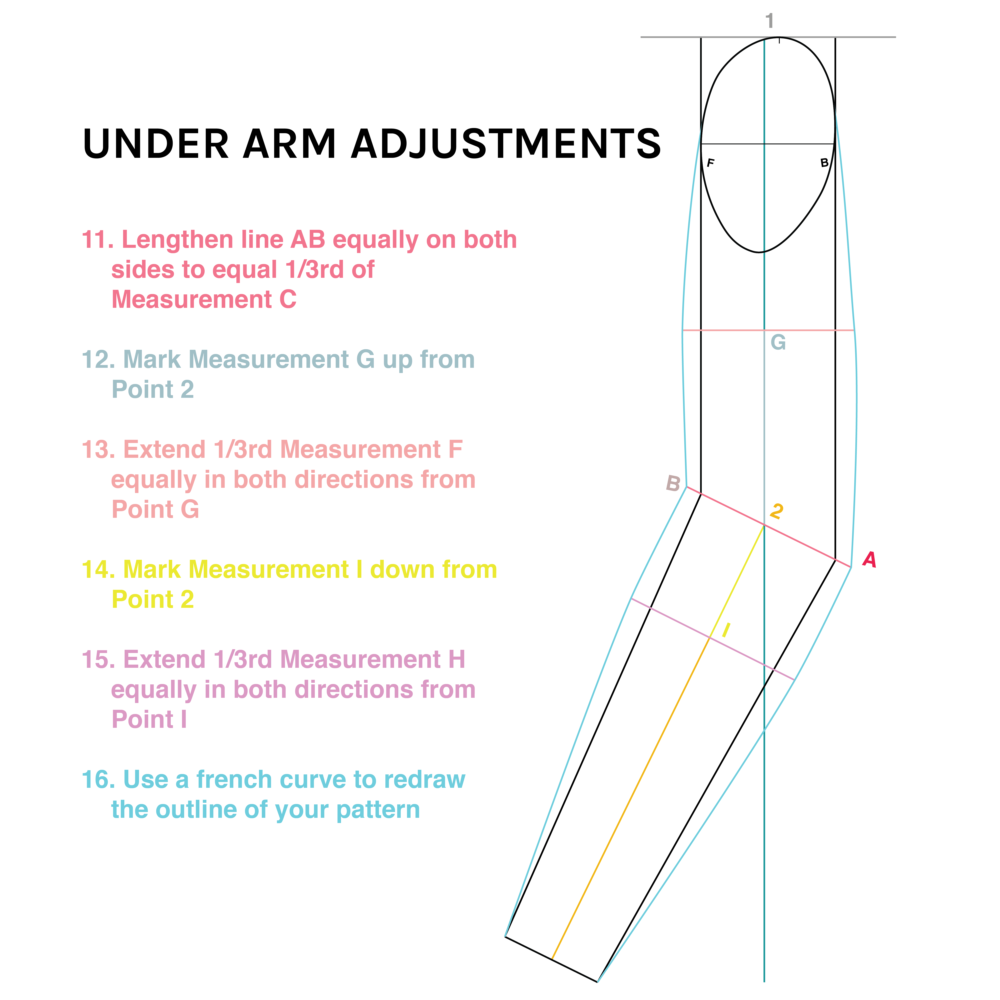
After your adjustments, it’s time for the outer arm!
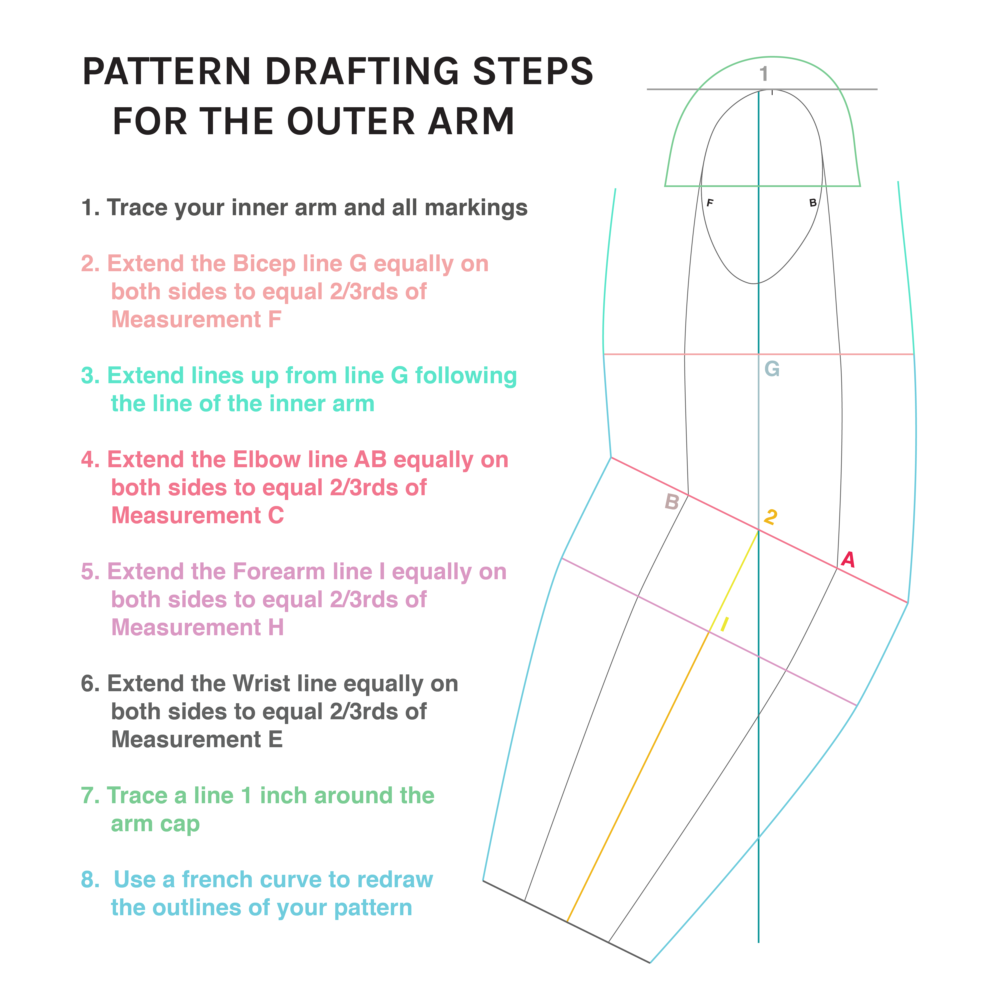
Time for the shoulder cap! There are a few ways you could do this. My recommendation is, you’ll probably want a dart or two. I went with no darts and just eased the sleeve in; easing two layers of heavy canvas really isn’t fun. I still have a few puckers, and if I do it again, I’ll be doing a dart to help take out some of that bulk.
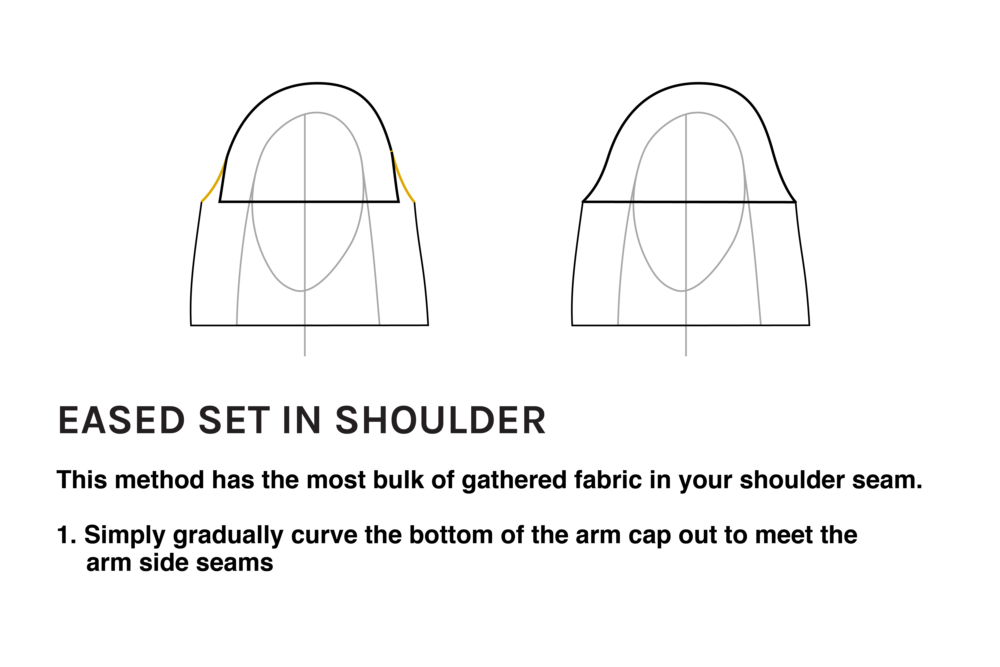
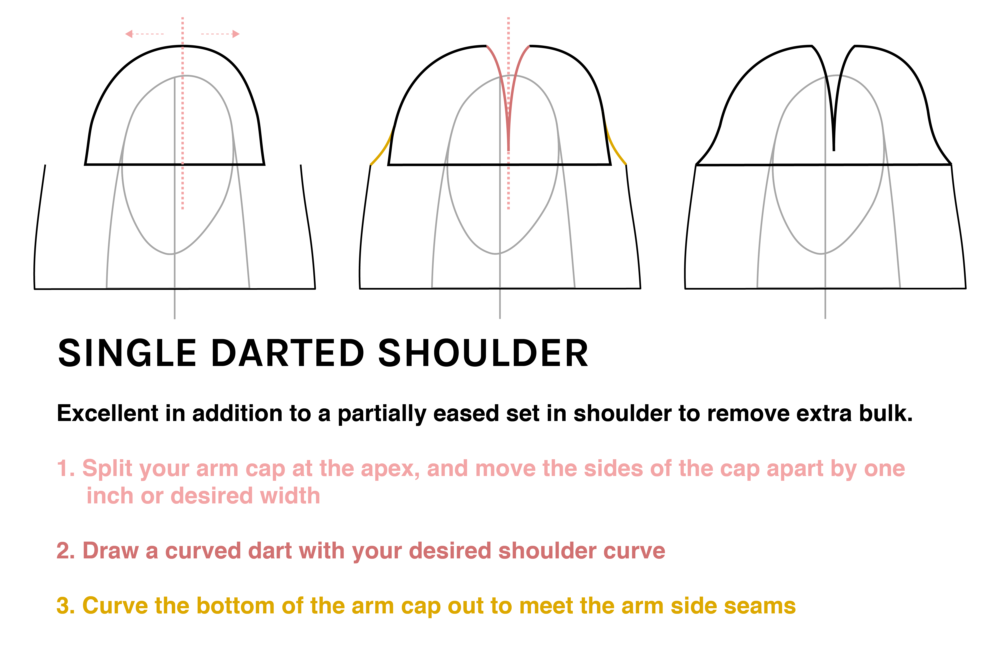
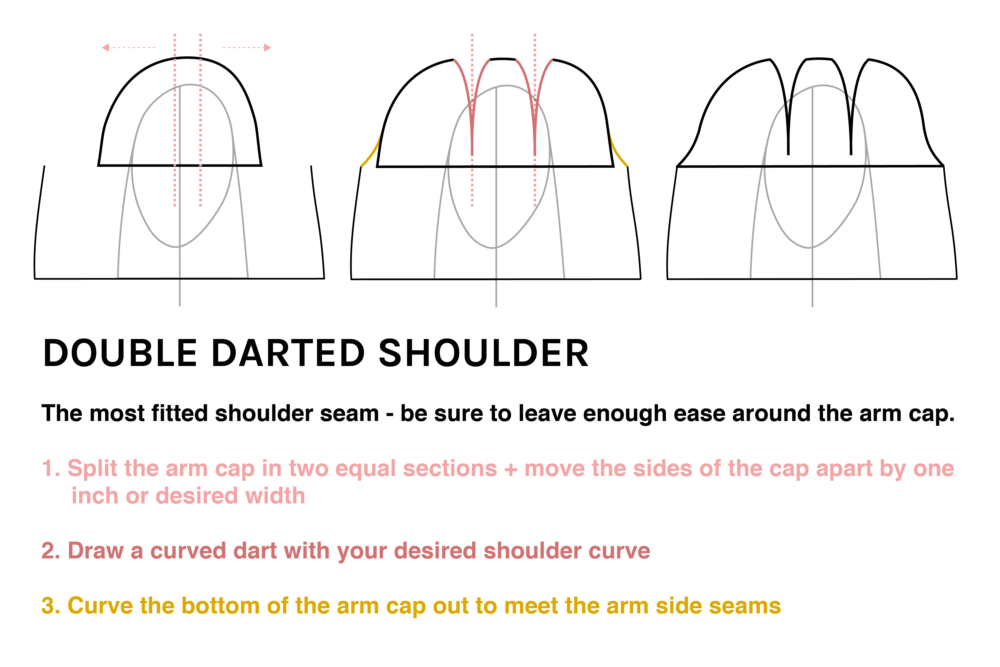
If you add a dart or two, make sure it’s pointing straight down along your vertical grainline. Also don’t forget! The curve you give the dart(s) will shape the silhouette of your shoulder. Something to keep in mind while designing the curve.
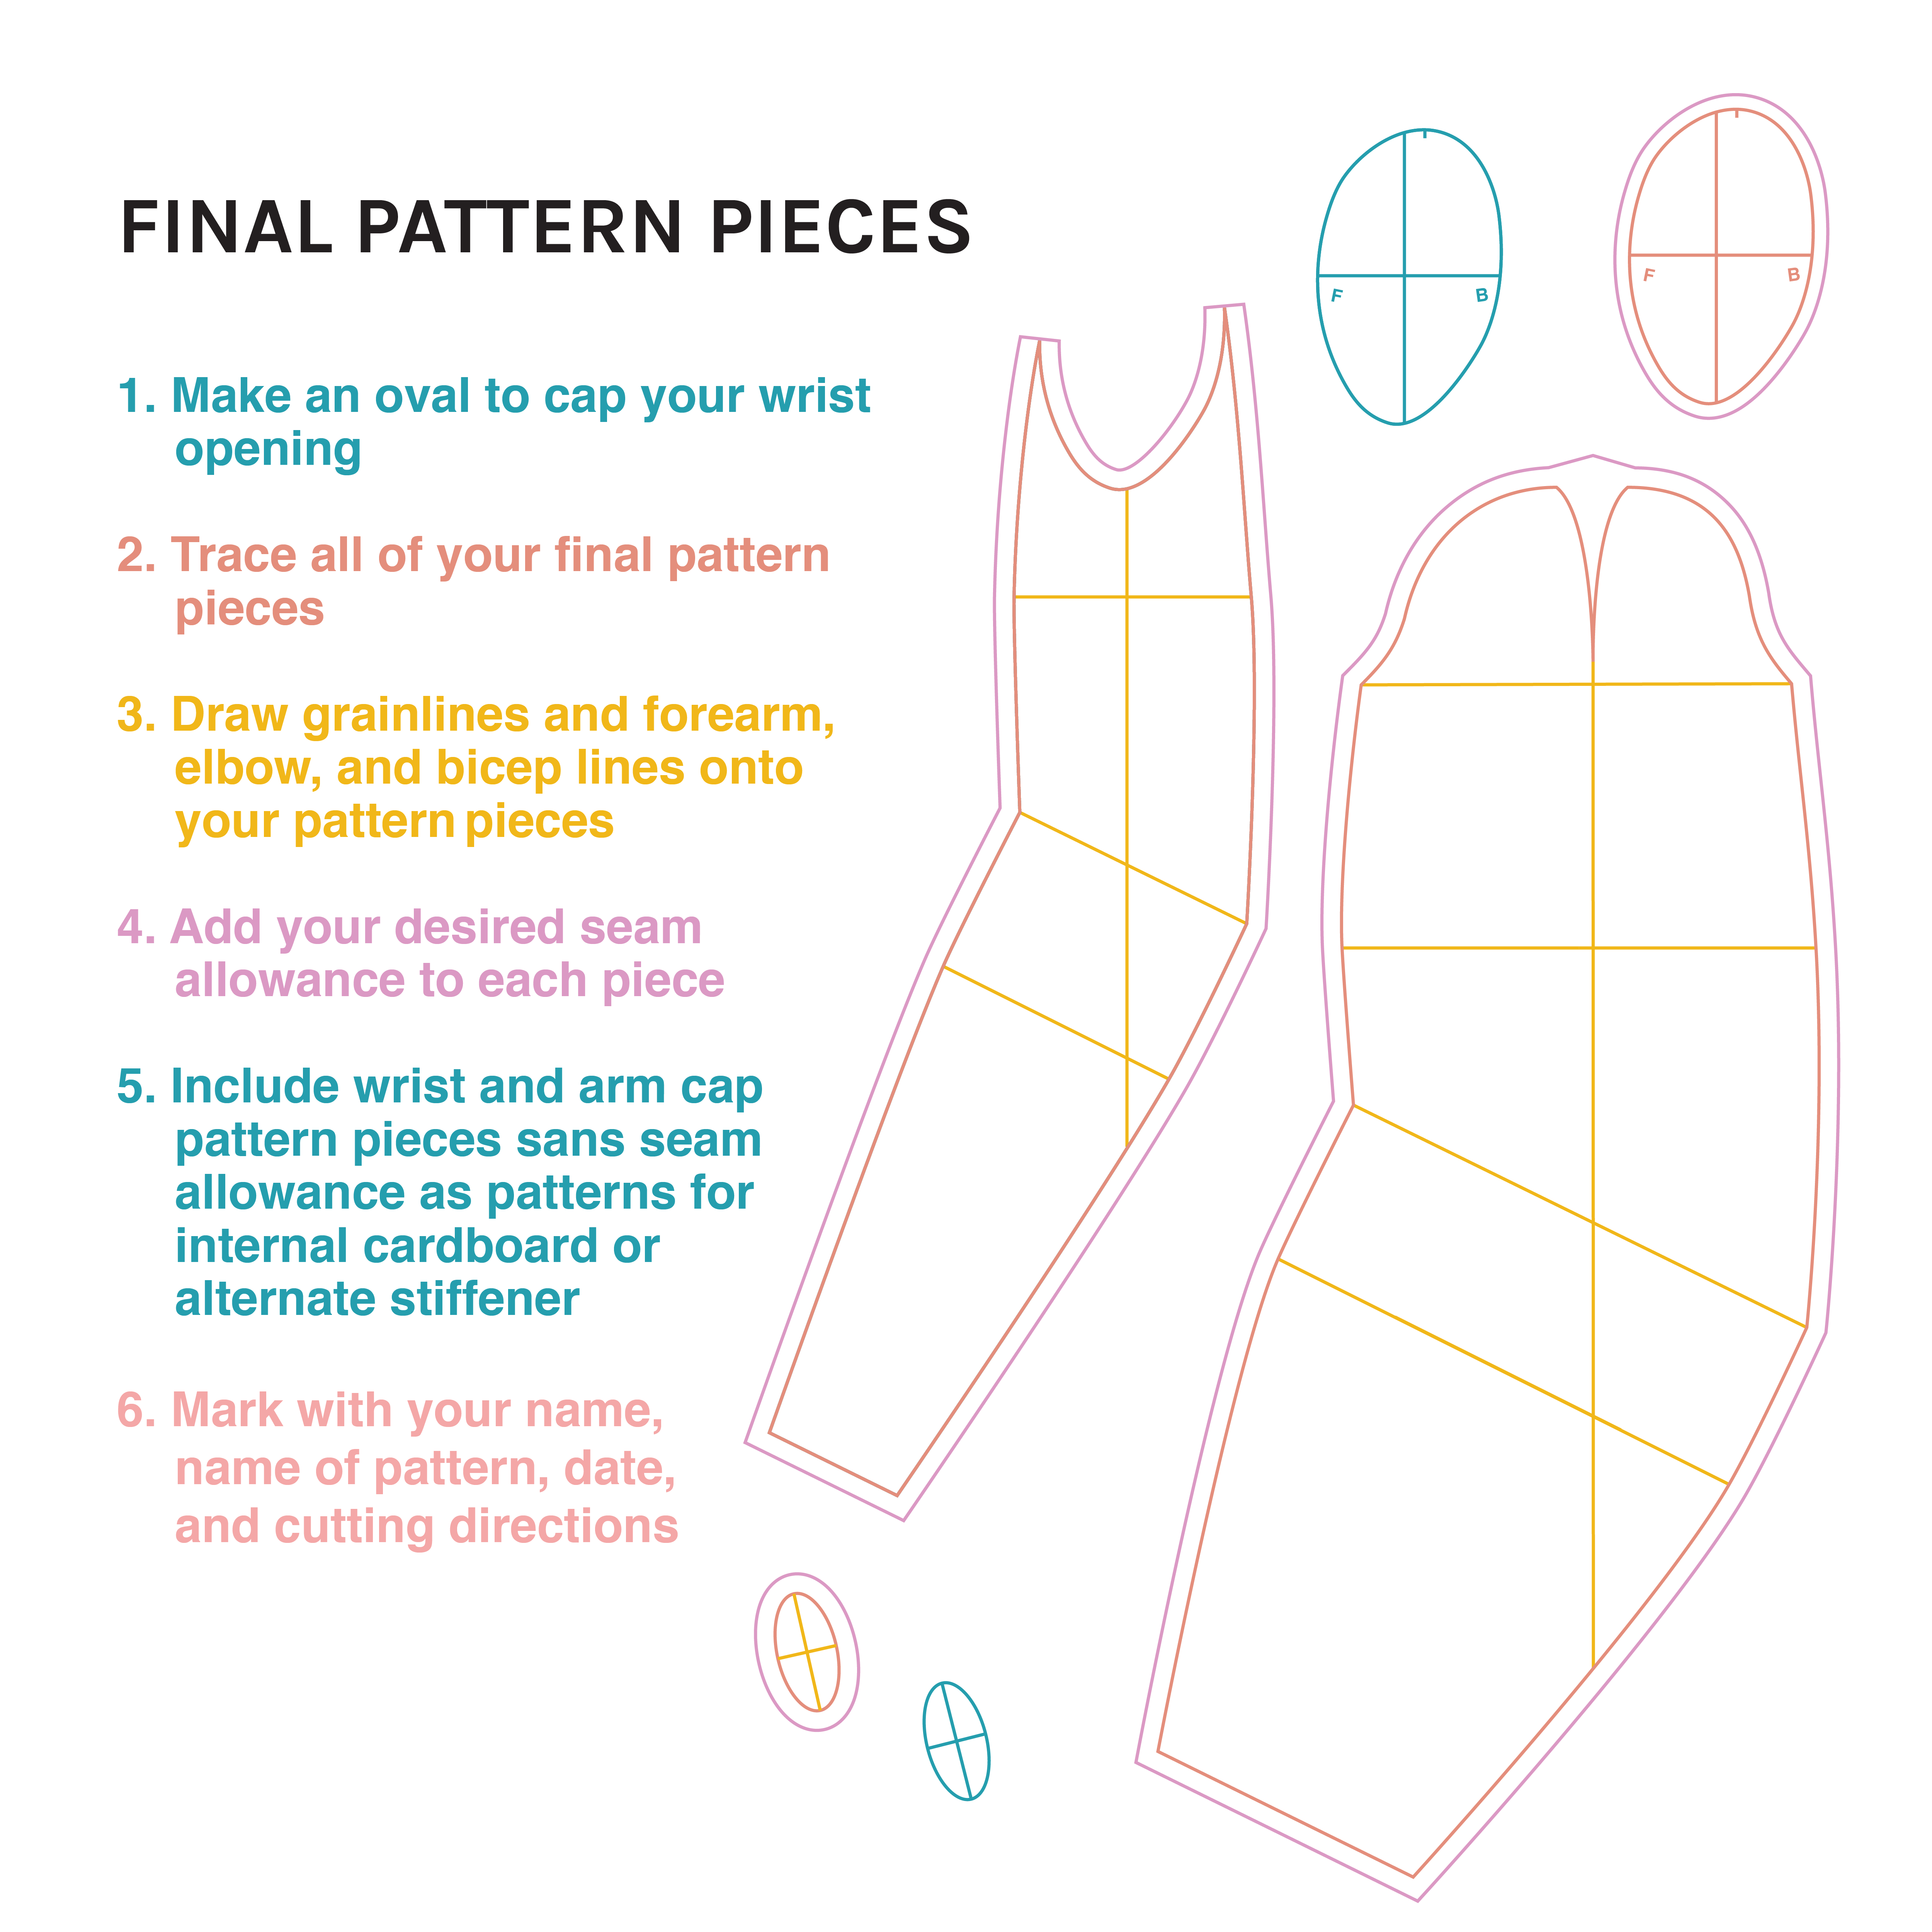
The lineup of your final pieces!!
For your wrist cap, a super easy way to draw this is to take your wrist circumference and plug it into the circle circumference equation
C=πd
Your circumference divided by Pi equals the diameter. Go on a computer drawing program and make an oval with the height of 2/3rds your diameter, and a width of 4/3rds your diameter.
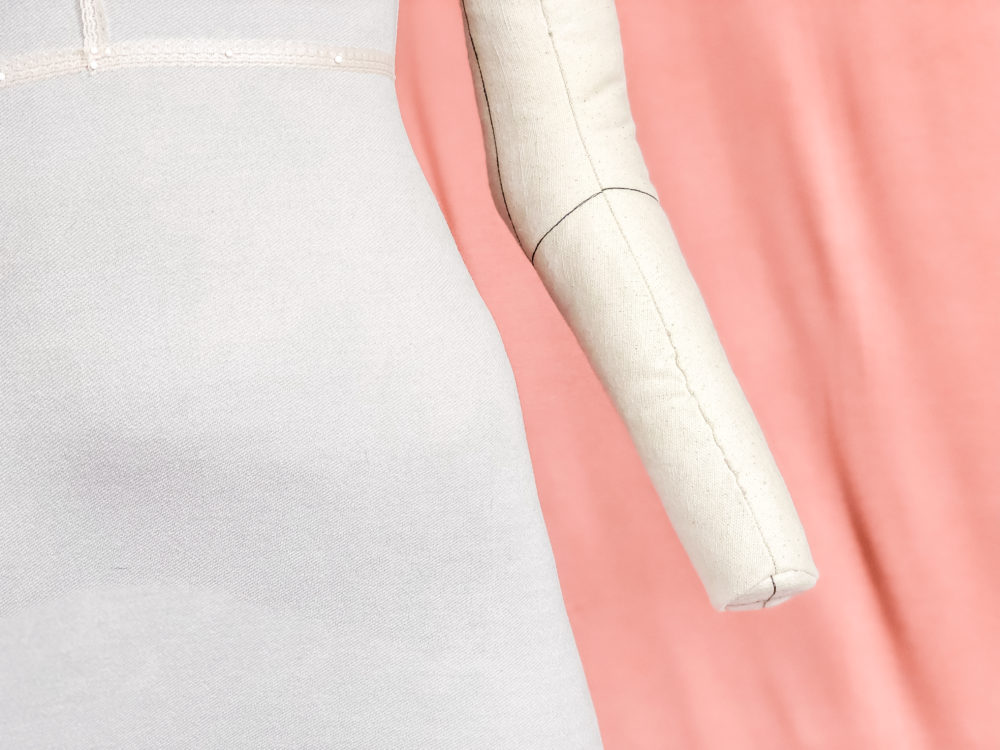
Perfect!
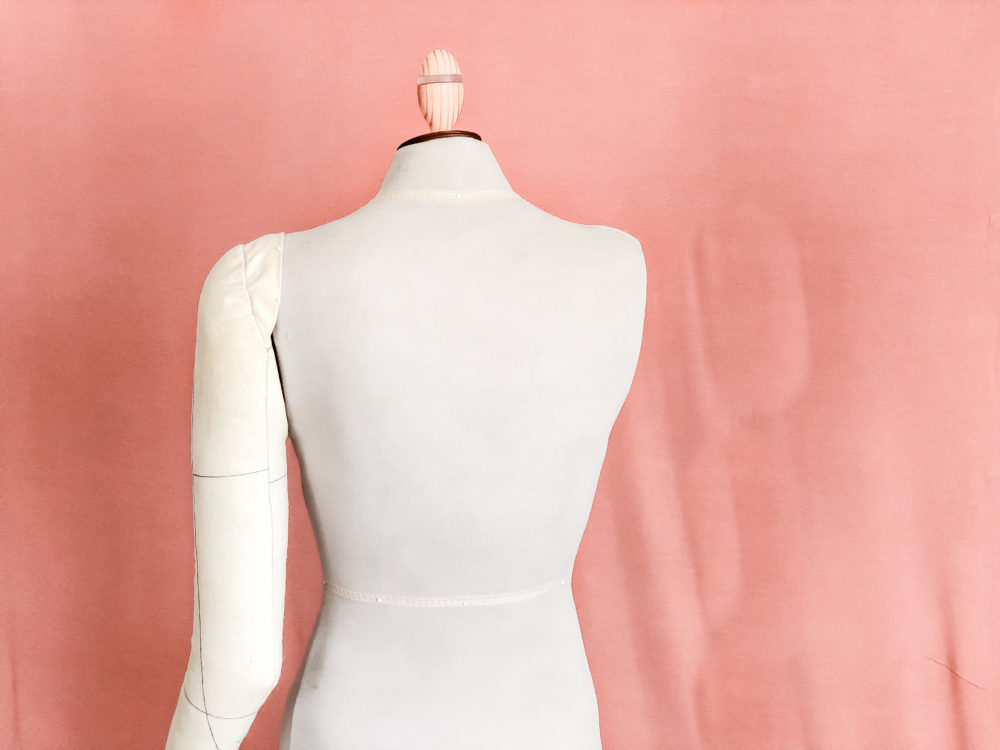
How cute is my arm?? Next up, I’ll be posting a sew-along showing you exactly how to put these pieces together, with finishing and construction tips.
Happy Sewing!
