
The other day we were talking about comfort bras on my Instagram (you can read the conversation in the comments here) and Ariane of Textillia mentioned that she can’t wear anything with elastic. So I thought, let’s do an elastic-free bra! This is the edge-finishing technique that will be in our upcoming tank top sewing pattern; it uses strips of your stretch fabric to bind all the edges, and even works for the straps! For this tutorial I used the Cartesian Crop Top, but this method will work for any bra or undie pattern (or any sewing pattern, really!

I started with gathering my fabrics- if you’re into sewing your own undies, my favourite thing is to keep literally all of my stretch fabric scraps. If a piece is at least three or four inches in diameter, you can use it as a colorblock panel! I pulled all of these scraps from my box. I had a long strip of our terra cotta jersey, so that became my straps and neckline edging. For the underbust band, I wanted something with a little more stability, so I went with the matching mesh from the terra cotta sewing kit. Micro mesh has more lycra in it, so its stretch is more durable than the jersey, which makes it perfect for the underbust!
The Cartesian Crop Top is designed to have a center back opening, but for this project, I decided to eliminate the opening to convert it into a pull on style. To do this, I placed the center back pattern piece on the fold along the center back edge.
I also changed the straps- originally, they’re all one piece with the center back bra edging (photos here). But I didn’t want to deal with that, so I added an extra set of rings to the back as you can see in the photo above. I’ll walk you through it.
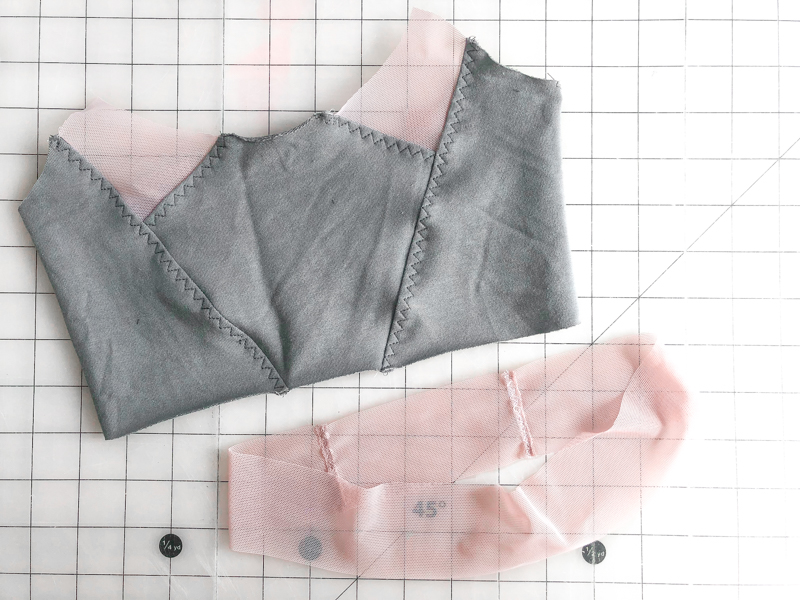
FOR THE UNDERBUST BAND
Cut a strip of stretch fabric horizontally along the direction of greatest stretch.

WIDTH– double the width you want, plus half an inch for seam allowance.
LENGTH: follow the underbust band guide in your pattern for the length.
INSTRUCTIONS
If your bralette is a pull on style, sew your band into a circle. Serge with a 1/4″ wide overlock seam, trimming no fabric, or sew on your sewing machine with a three step zig zag stitch. (that’s what I did for this tutorial.) If you’re using a closure such as a hook and eye tab, skip this step.
Understitch the seam allowance with a three step zig zag if desired, highly recommended if not using a serger.
My fabric wasn’t wide enough for the whole strip in one piece, so I cut two pieces and sewed them together in one spot to make a new long piece, which I cut to length according to my underbust band guide. After sewing into a circle, I had two seams, which I centered at the back for a decorative design feature!
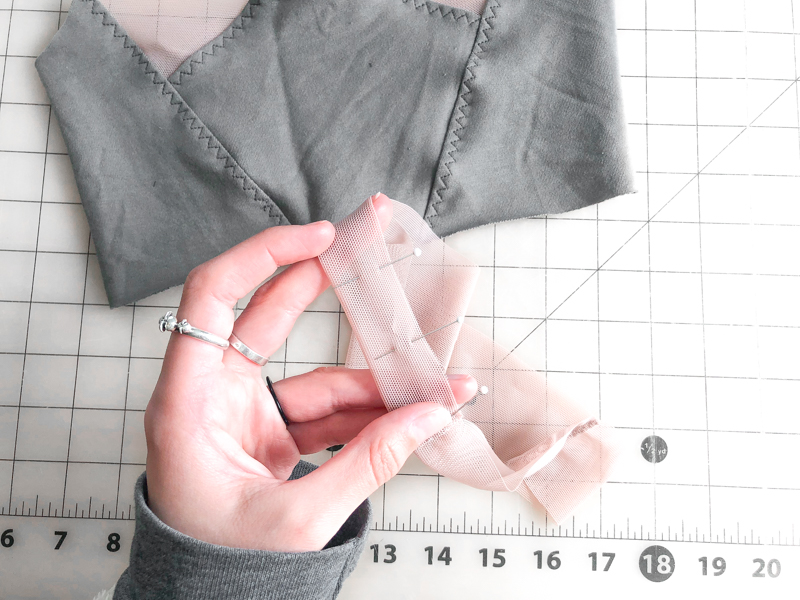
Once you have your band into a circle, fold it in half, right side out and pin around the circle.
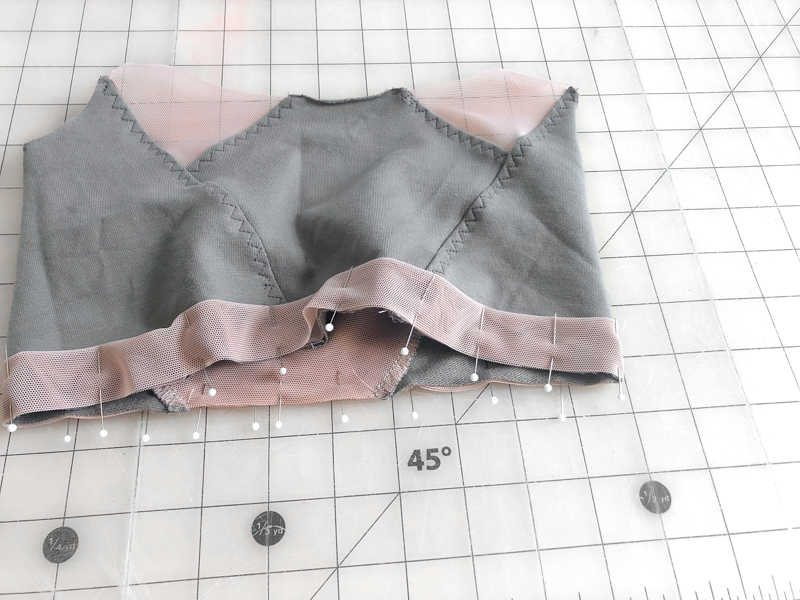
Pin the band to the right side of your bralette along the bottom, raw edges along the raw edge of the bralette. If you have a pull over style, mark both the bralette and the band into quarters, match up the quarters, then stretch and pin evenly to disperse the two fabrics.
If you are using a closure such as a hook and eye tab, mark both the bralette and the band in the middle + pin, pin the edges, then stretch and pin evenly to disperse the two fabrics.
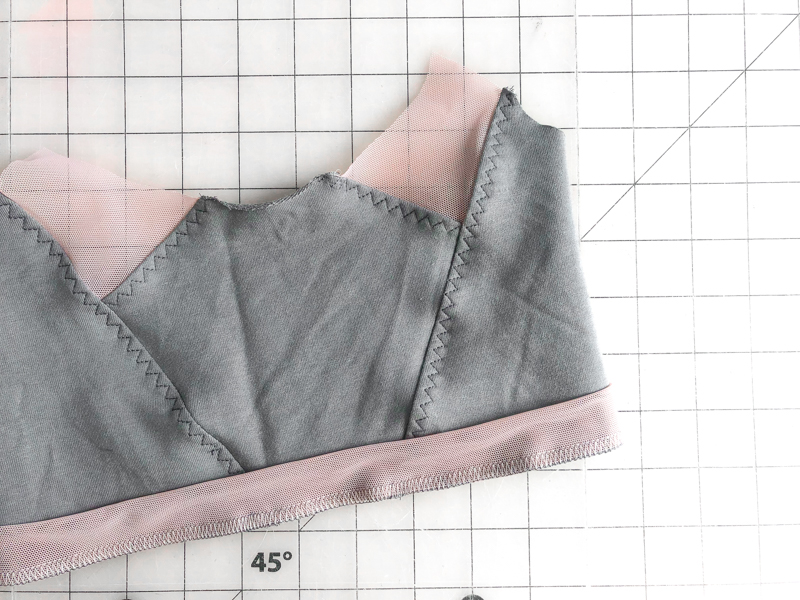
Serge with a 1/4″ wide overlock seam, trimming no fabric, or sew on your sewing machine with a three step zig zag stitch.
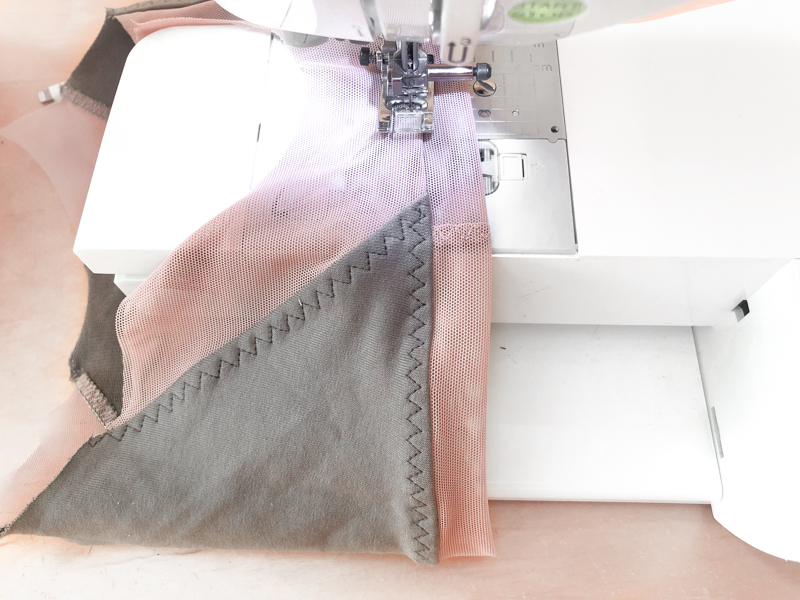
Understitch the seam allowance with your three step zig zag stitch to fully secure the band in place, and to keep it from folding up.
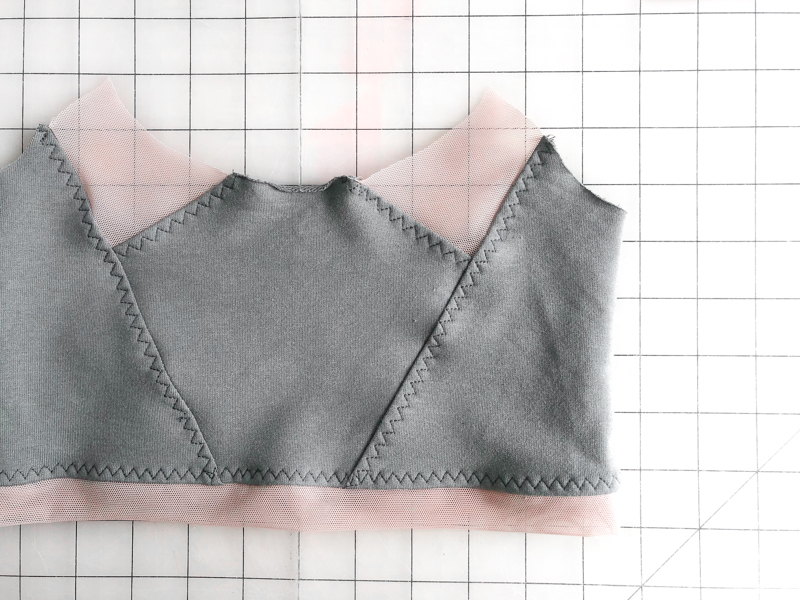
Ta da! So lovely.
Now for the neckline edging.
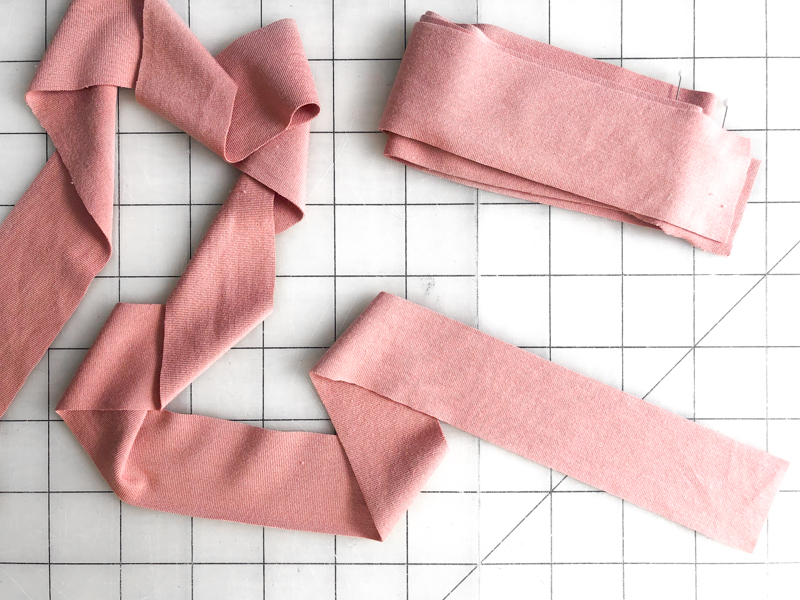
Cut your long strips of fabric that will be your neckline edging and straps. Follow the same guide, above, for the direction of greatest stretch.
WIDTH– double the width you want, plus half an inch.
I did just under an inch and a half, so the straps could be half an inch wide.
LENGTH- As long as you’ll need to replace all of the elastic bands, as well as the straps.
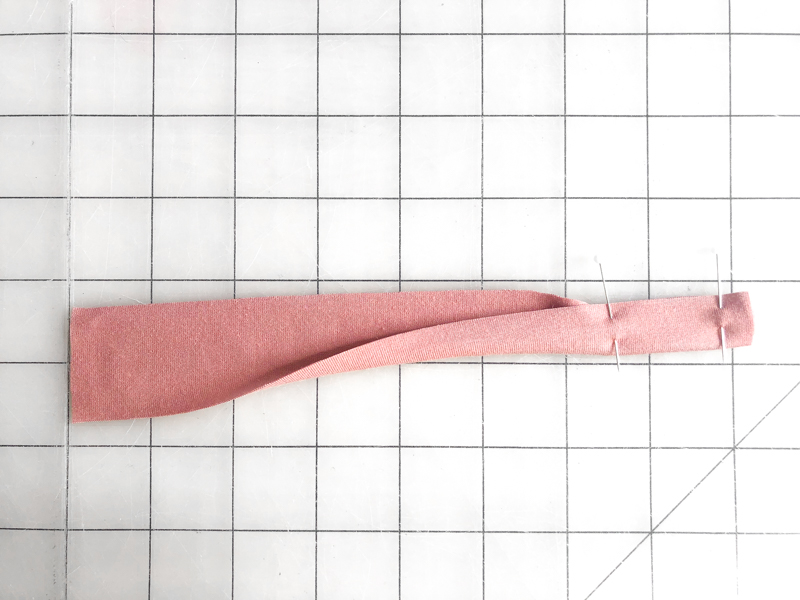
Starting with the center front neckline! Cut a piece of your fabric strip according to the elastic measurement chart in your pattern. Fold in half with right side out just like the last band.
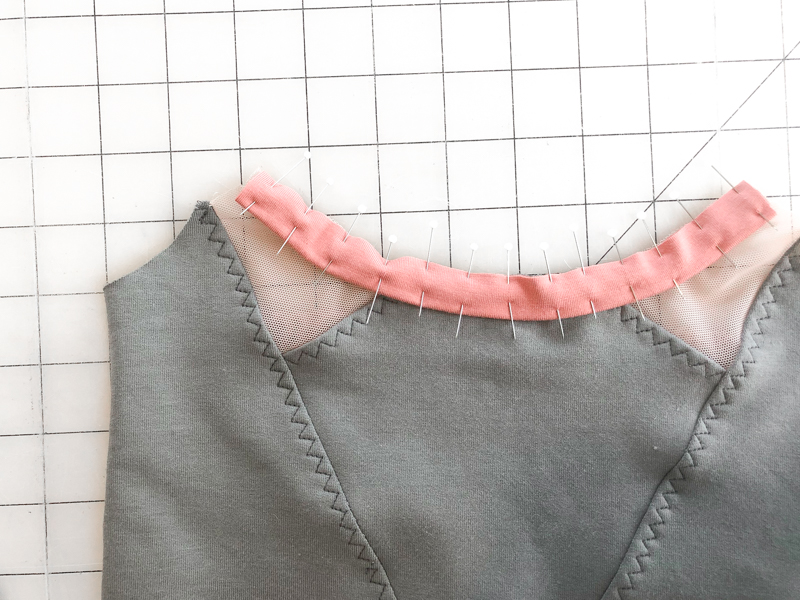
Pin to your neckline on the right side. Start by matching up the centers, then the edges, then stretch + pin to disperse the fabrics evenly.
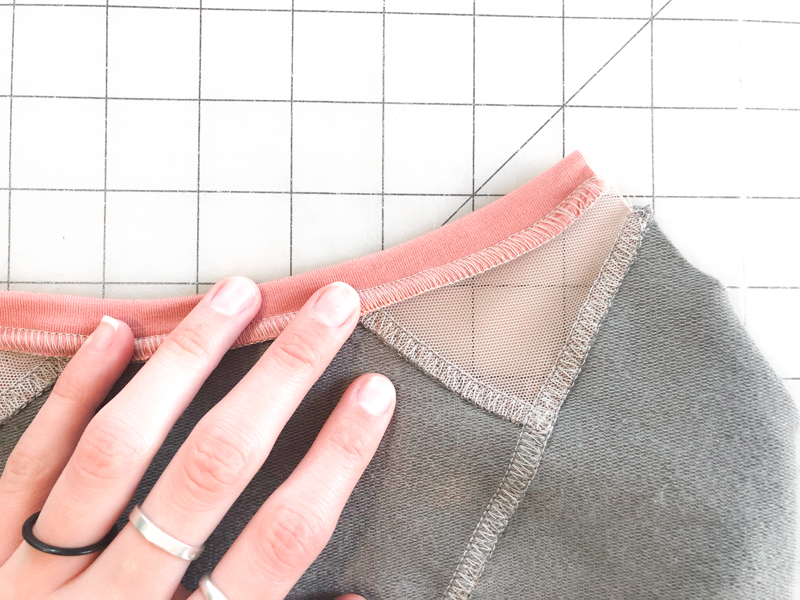
Serge or sew with three step zig zag.
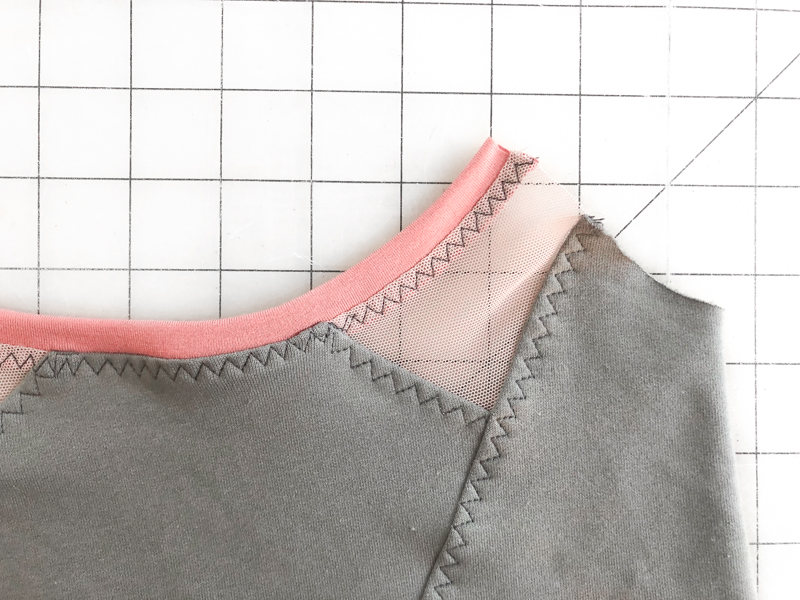
And understitch the seam allowance!
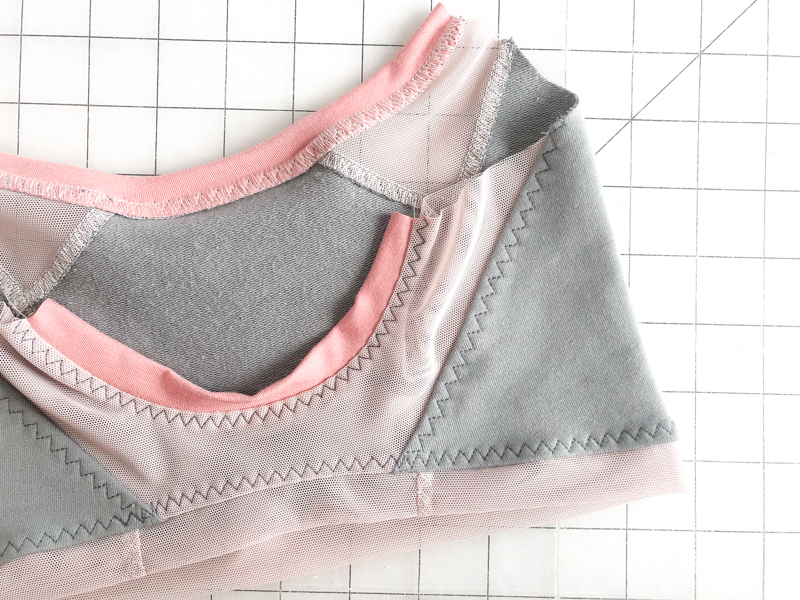
Do the same thing for your center back! For the edging, since I eliminated the center back opening, I doubled the length noted in the elastic measurement chart, and didn’t include the straps on this piece, so I could construct them differently.
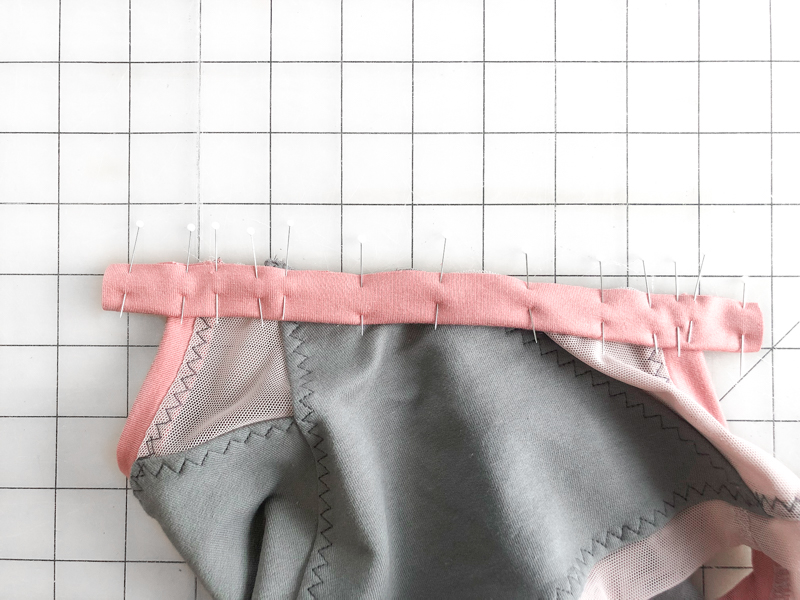
Ok the sides of the bralette- here’s the part where we add another set of rings to the back of the bra. Cut your strips of fabric according to the elastic measurement chart, plus one inch for the extra rings.
Mark an inch at each end of both straps. Pin to the right side with raw edges matching, leaving an inch of edging on each end. Sew and understitch the seam allowance.
TO ADD THE RINGS
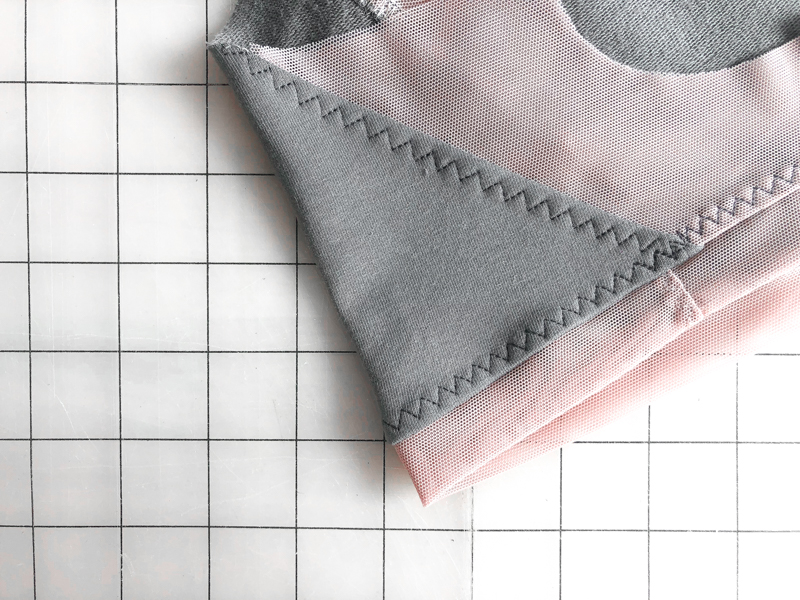
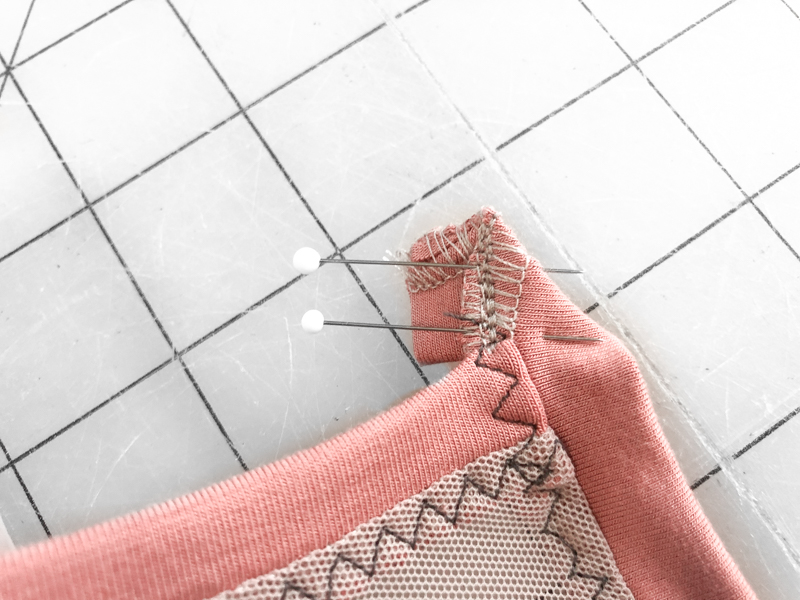
Fold the 1″ tabs diagonally to form a little triangle, according to the photo above. Stitch and backstitch with a straight stitch along the serged seam, just catching the edge of the neckline edging. This staystitching secures this piece to keep your ring tabs from stretching out. (this photo is the view from the right side of the bralette)
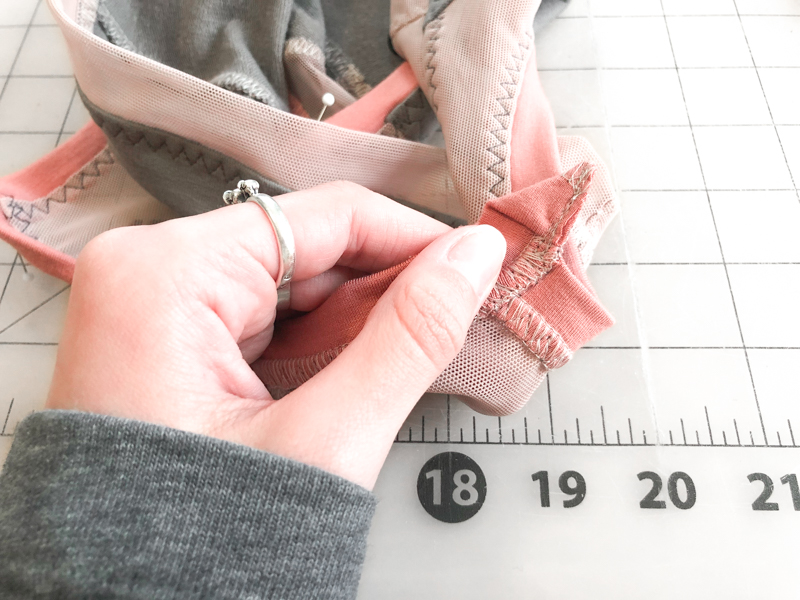
Trim the extra fabric near your stitching line, making a neat little triangle. (This photo is the view from the wrong side.)
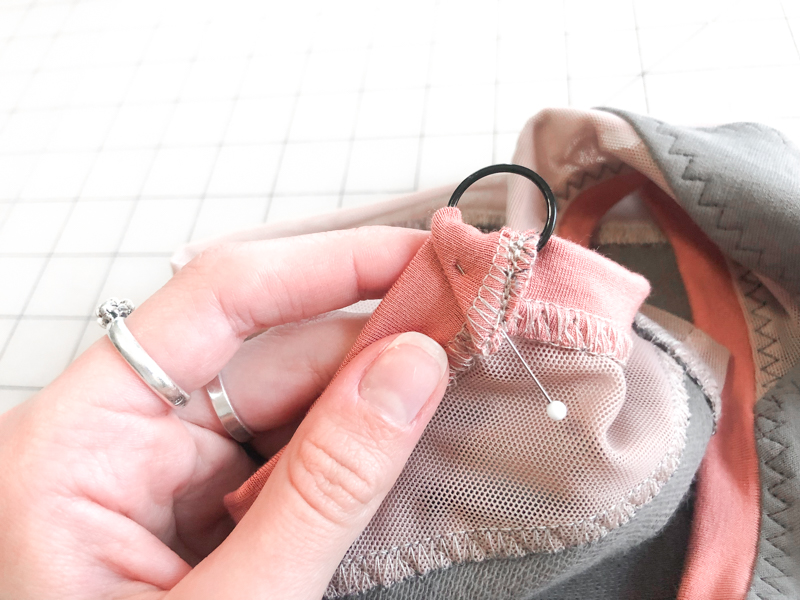
Add your ring to your tab. Fold the little triangle down and pin.
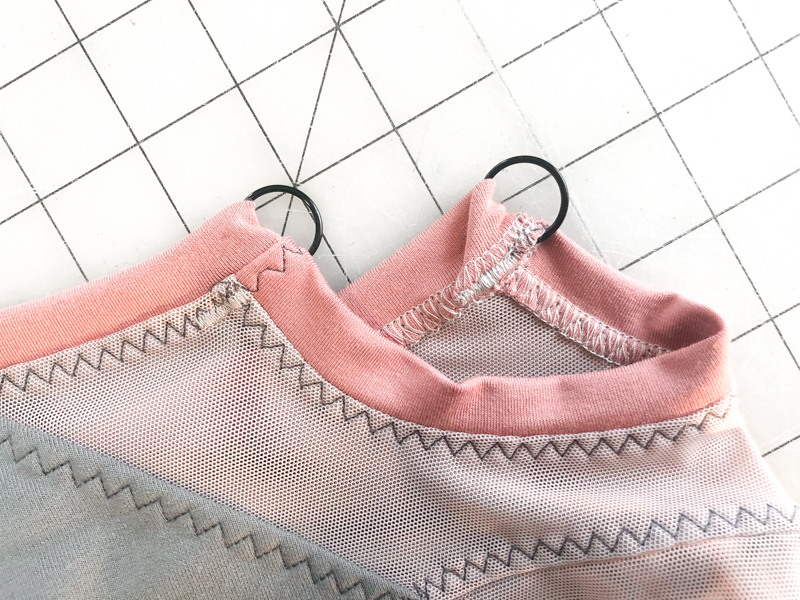
Use a narrow zig zag to create a bar tack to secure your tabs, stitching over your original straight stay stitches.
If you notice, I didn’t zig zag stitch past the edge of the serged seam, which kept my bar tack from extending up onto the edging. You don’t want to sew too close to your rings or you could hit one and break a needle. Also I think it looks nice to have a clean stitch line!
STRAPS
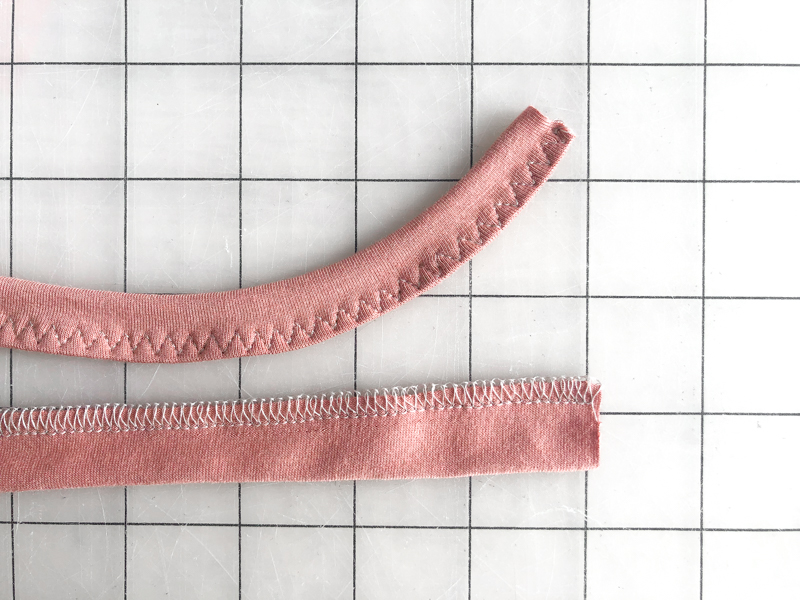
Cut your strips of fabric to length for the straps. I usually go 20 inches. Fold in half right sides together, serge or three step zig zag. Turn right side out with a safety pin, then top stitch the seam allowance with a three step zig zag stitch to secure, stabilize, and keep the strap from rolling.
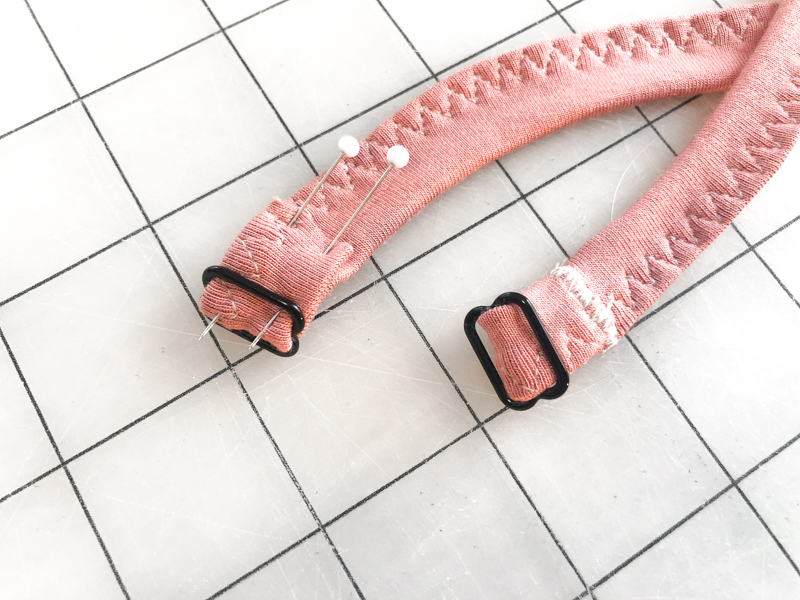
Add your rings to one end, and secure with a narrow zig zag stitch.
I looped my straps around the front rings, and secured using the same little staystitched triangle method to the rings at the back. You can see my zig zagged bar tacks in the photos below. I think it’s cute!
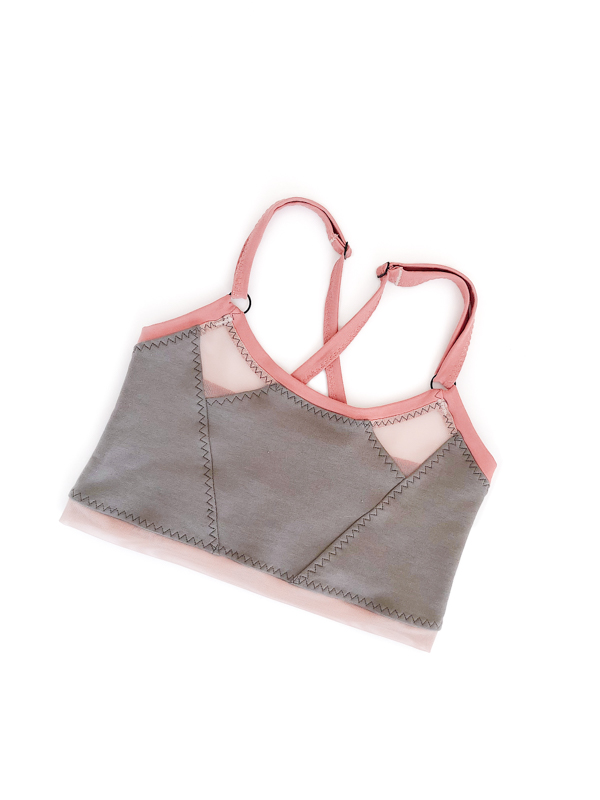
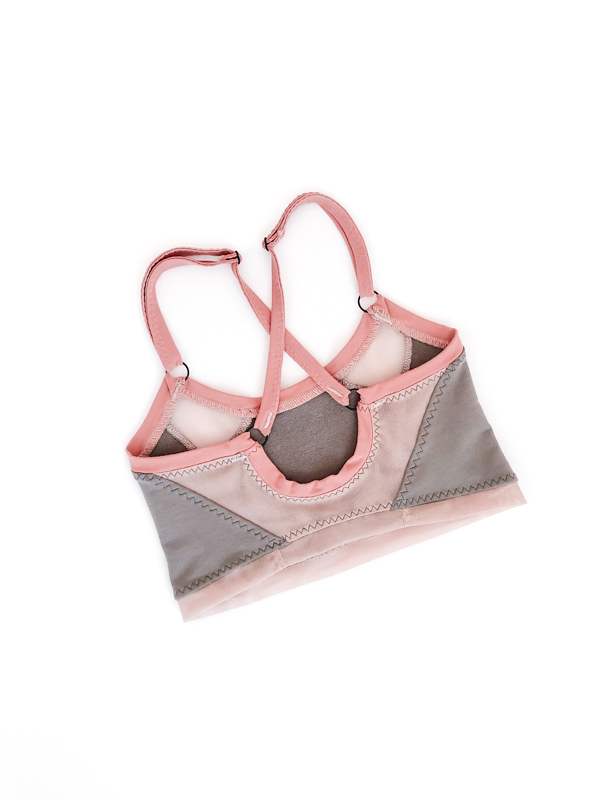


And there it is, an elastic free bra! I’d love to hear how this technique works for you!
